Showing posts with label paper piecing. Show all posts

February 26, 2015

Christmas Cards 2014

Okay, try not to panic at the mentioning of 'Christmas' already.  The truth is, I'm a wee bit backlogged in posting so despite the fact that it's nearly March, I still wanted to share my 2014 Christmas cards with you, for inspiration purposes if nothing else.  And let's be honest, I know there are a few of you out there already working on this year's Christmas cards and presents (you know who you are).

Now, having started a job at a new school this academic year, I was feeling slightly more swamped than usual coming up to the holiday season and I was having a hard time coming up with card ideas.  Luckily there's always Pinterest for just such occasions!  I've always loved this card since first seeing it and so used it for my inspiration:


So I set about planning how I could recreate it.  For the circles, I invested in a Martha Steward circle cutter, which (personal feelings concerning Martha Steward aside) is pretty darn awesome and much better than my old and crude circle cutter tool.  I have plenty of ribbon so the scarf wouldn't present a problem but the die cut arms would, as I don't have a die cutter to hand...  And finally, while I could certainly use paint and the circular tip of a paintbrush to stamp out the charcoal bits, I really wanted to ideally use some sort of black rhinestones for dimension but that would require a lot of rhinestones and where would I find those in quantity for a good price?

Happily, it all worked out:
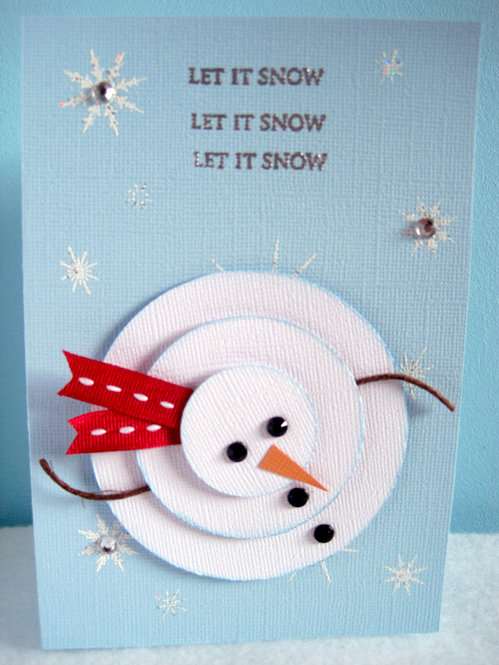
My version

I would have liked to have made them square like in the inspiration card but I make 40-50 cards each year and so I need to buy envelopes in bulk and unfortunately, the dollar store equivalent over here doesn't stock square envelopes in bulk so I went with the traditional A6 sized format instead, which admittedly isn't as nicely balanced but there you go.  Sometimes you just have to think practically.

You can see how nicely the circles turned out using the new circle cutter.  I also decided to ink my circles in a light blue tinge instead of the grey of the inspiration card (which I felt looked a bit dirty and I like my snow pristine looking).  For the background, I stamped a variety of snowflakes and then heat embossed them with a 'snowflake' powder, which is essentially a white with silver flecks mixed in.  I also popped a few clear rhinestones on for a bit of sparkle.
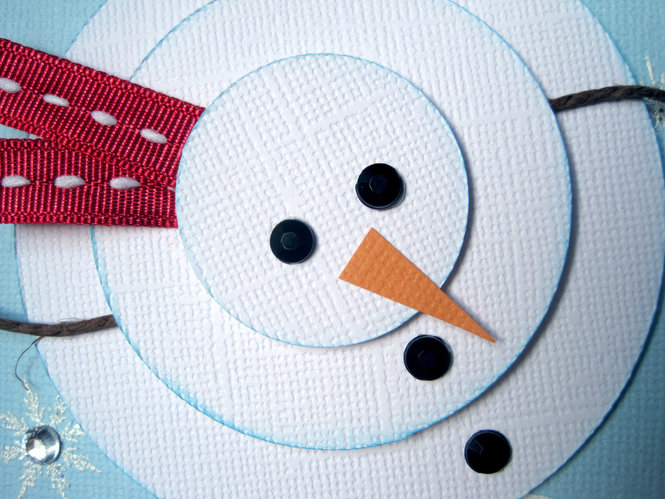
Detail view

A nice bright red ribbon made this little fellow's scarf but I had about five different ribbons that I used so there was a little variety to the set.  For the arms, I decided some dark brown twine would look suitably like branches and add another textural element, which I liked.  And I totally lucked out at the dollar store when I stumbled over massive sheets of colour self-adhering rhinestones, including black!  They were like perfect little chunks of charcoal just waiting for a snowman to adorn!  Serendipity, I tell you.

August 20, 2014

Persian Pickle Project 2014

Hello, hello!

I'm so excited to be sharing a completed project with you today!  In case you haven't yet noticed, I'm not always (cough, cough - usually) very good about finishing sewing projects...  But this one had a deadline and I usually work well towards deadlines (if you count waiting to nearly the last minute as working well - thanks, Mum).  Anyway, personal foibles aside...

You may recall that at the beginning of the year, my Haberdashery sewing group had decided to do a group project based on the fabric swapping principle behind the book The Persian Pickle Club.  You can find the full details of our project in this post.

In February we made our fabric swaps, which you can read up on in this post.  And here is the photo of all our fabrics together (unsurprisingly, mine is the orange dragonfly print).


Right from the beginning I had an idea of what I wanted to do for a design - a paper pieced circle of geese blocks.  I had intended on using basic white as the background colour but since so many of the fabric contributions were pale or light coloured, a darker background would be necessary.  Except that I didn't want to use black, because it felt very flat so instead I found a mottled brown with warm and cool tints throughout it; it's not really my style but I think it works with the rest of the prints and sometimes you've got to work outside of your comfort zone.

And so...the big reveal!


Ta da!  The wallhanging finishes at 40cm square (as stated in the project requirements).  It features a central circle of geese block in counter-clockwise rotation (yeah, I'd meant to do it clockwise and printed off the wrong pattern by mistake - oops but not the end of the world).  I added a one inch border into which I used some off-cuts of the fabrics to lick & stick tiny geese around the edges using odd numbered groupings and gaps for added interest.

The quilting was a little challenging as my machine is quite old; so old it's been impossible to find a quilting foot that will work with it so I had to go slowly with a regular sewing foot and ease in fabric manually where needed.  My machine can also sometimes have tension issues when quilting but luckily I seemed to find the right combinations of settings this time around.


Originally I had thought to reinforce the circular concept by quilting concentric circles in the center.  Unfortunately you can imagine my dismay (and laughter) when I realised that I'd effectively quilted a bulls-eye into the center of my geese...  Open season, anyone?

Time for Plan B: geese flying by star light.  I stitched in the ditch around the large central star shape and added some additional lines in each arm of the star.  Then I drafted a smaller star template which I quilted into the corners.  For the geese I stitched in the ditch around each goose and then added arched lines on the insides.  I repeated this quilting on the small one inch geese in the borders (not easy, I can assure you).  I also quilted simple geese shapes into the rest of the borders; 12 geese per border, one every inch and some I reversed, again for interest.


The final touch, I recorded the project and contributors on the hanging sleeve on the back.  This Tuesday we will be revealing all of our wallhangings to each other at our next Haberdashery meeting.  Then the whole collection will be put on display at our guild exhibition end of September, which will be exciting.

May 04, 2014

Pinspiration Sunday

I know, Pinspiration Sunday has been MIA for several weeks now.  Sorry about that.  No real good excuse, just life happening and my attempting to recover from it whenever possible (in good ways, nothing tragic).  Anyway, we're back today so go grab your hot beverage of choice and let's do this!

Currently:

* listening - radio, Mix Top 20
* reading - The Last Letter from Your Lover by Jojo Moyes
* making - HST Sampler Quilt-Along
* eating - nothing yet but hungry for brunch
* drinking - water
* wearing - PJs
* weather - clear but cold, 10C
* feeling - hungry
* wanting - warm weather to return
* needing - to go grocery shopping
* planning - quilting bucket list
* thinking - new list of cards to make this month
* loving - snuggle time with Oskar
* enjoying - crafty goodness

And now on to the pins...

So beautiful and whimsical.  Sadly, this is just a Flickr photo and there is no linked pattern but if you really wanted to do it, you could probably contact the owner and inquire directly.

These little blocks made from fabric scraps are so cheery, they're sure to make a fabulous quilt when all put together.

Utterly adorable little stitched owls.  These would be cute as pin cushions (if you can bare stabbing them with pins, that is), children's toys or just cute decorations.

I also really loved these little bookmarks.  They're made from fabric covered buttons and a bit of elastic and embellishments.  Very cute and clever.

Paper straws have become another trending embellishment but I know many people are stumped with how to use them so here's another idea for working them into your scrapbooking LOs.

Big and bold, this circular design is very eye-catching.  I also really liked how an enlarged photo and the journaling were used inside the circle element instead of just patterned paper.

So simple and elegant, I just love this card.  Beautiful sentiment, too.  This one speaks for itself.

And for all of you Dr. Who geeks out there, how about a cool 3D Tardis card?

And here's a little crafty DIY you could do for your home decor or work into a scrapbooking LO or use as inspiration for sewing and quilting (or whatever hobby you do).

March 16, 2014

Pinspiration Sunday

Post #100!

Wow, I nearly missed noticing it but this is officially the 100th post!  Furthermore, I've ticked over 9000 page views since this little blog started last summer.  Not too shabby, if I dare say so myself.  And of course, a big thank you to all of you who pop by to read, comment and share in my hobbies and snippets of life.  Now, go grab your hot beverage of choice and we'll get the day officially started with some photo love.

Currently:

* listening - radio
* reading - catching myself up on quilting & papercrafting magazines
* making - layer cake sampler quilt-along
* eating - nothing yet; brunch soon
* drinking - water
* wearing - PJs & cardie
* weather - rainy, 8C
* feeling - hungry
* wanting - to sew, sew, sew!
* needing - to book tickets to Ireland & hostel
* planning - belated Shrove Tuesday (AKA Pancake Day) supper with friends
* thinking - what to do today...
* loving - new fabrics
* enjoying -  lazy Sunday morning in bed

And now on to the pins:

It's chevron, it's turquoise and it's ombre - swoon!  No actual pattern (just HST, after all) but great inspiration and some tips for best effect.

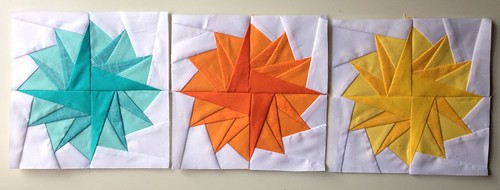
Remember that circle of flying geese pattern I mentioned for my Persian Pickle Project?  Well, take the same paper piecing pattern and make pompoms!

Here's another handy guide for starting free motion quilting, focusing on steps to prepare your machine for the project.

I've been meaning to make a small one of these for ages to put cutlery into when going to quilt guild.  Don't limit yourself just to cutlery, though - you could use these for many different items and adjust the pocket sizes as needed.

I always love Jill's work and these artsy pie charts are such fun!  A nice way to break out of the traditional scrapbooking format and have some fun with scraps, too.

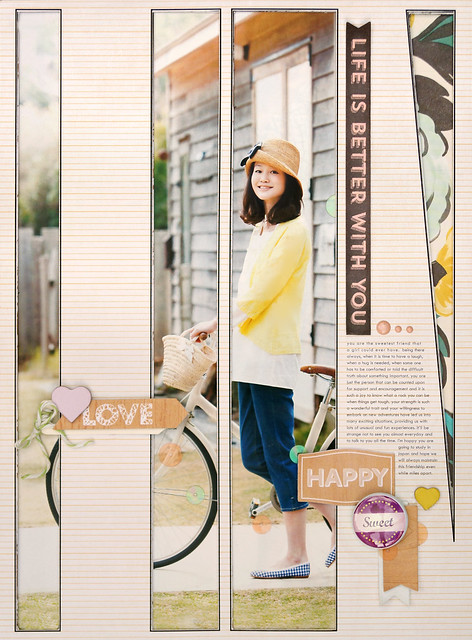
Here's another interesting idea for those of you who want more inspiration for using photo enlargements.  Sandy has cut large slits into her background paper and adhered the photo to the back so that sections peek through to the front - neat visual interest.  I also really like the black doodle lines around each window.

Okay, let me preface this by saying that green is my least favourite colour.  However, this colour palette is just gorgeous!  The mix of limes, turquoise and an unexpected lavender is very refreshing and spring-like.  Love it.

And finally, I stumbled over this adorable quilter's rendition of the 'Soft Kitty' song from Big Band Theory (total fangirl).  Yup, just awesome.