Showing posts with label embossing. Show all posts

February 26, 2015

Christmas Cards 2014

Okay, try not to panic at the mentioning of 'Christmas' already.  The truth is, I'm a wee bit backlogged in posting so despite the fact that it's nearly March, I still wanted to share my 2014 Christmas cards with you, for inspiration purposes if nothing else.  And let's be honest, I know there are a few of you out there already working on this year's Christmas cards and presents (you know who you are).

Now, having started a job at a new school this academic year, I was feeling slightly more swamped than usual coming up to the holiday season and I was having a hard time coming up with card ideas.  Luckily there's always Pinterest for just such occasions!  I've always loved this card since first seeing it and so used it for my inspiration:


So I set about planning how I could recreate it.  For the circles, I invested in a Martha Steward circle cutter, which (personal feelings concerning Martha Steward aside) is pretty darn awesome and much better than my old and crude circle cutter tool.  I have plenty of ribbon so the scarf wouldn't present a problem but the die cut arms would, as I don't have a die cutter to hand...  And finally, while I could certainly use paint and the circular tip of a paintbrush to stamp out the charcoal bits, I really wanted to ideally use some sort of black rhinestones for dimension but that would require a lot of rhinestones and where would I find those in quantity for a good price?

Happily, it all worked out:
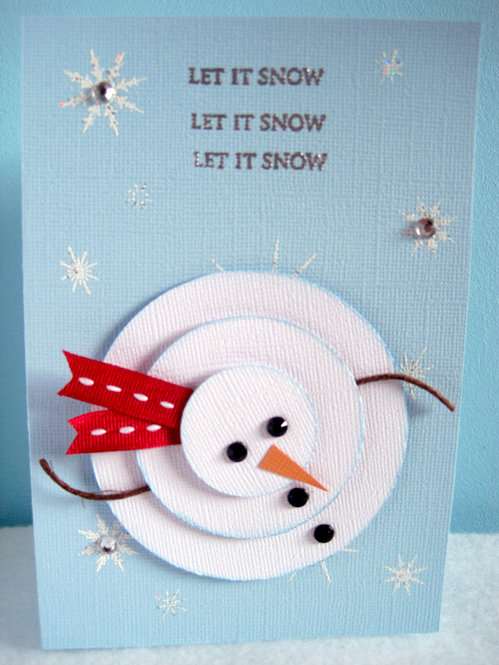
My version

I would have liked to have made them square like in the inspiration card but I make 40-50 cards each year and so I need to buy envelopes in bulk and unfortunately, the dollar store equivalent over here doesn't stock square envelopes in bulk so I went with the traditional A6 sized format instead, which admittedly isn't as nicely balanced but there you go.  Sometimes you just have to think practically.

You can see how nicely the circles turned out using the new circle cutter.  I also decided to ink my circles in a light blue tinge instead of the grey of the inspiration card (which I felt looked a bit dirty and I like my snow pristine looking).  For the background, I stamped a variety of snowflakes and then heat embossed them with a 'snowflake' powder, which is essentially a white with silver flecks mixed in.  I also popped a few clear rhinestones on for a bit of sparkle.
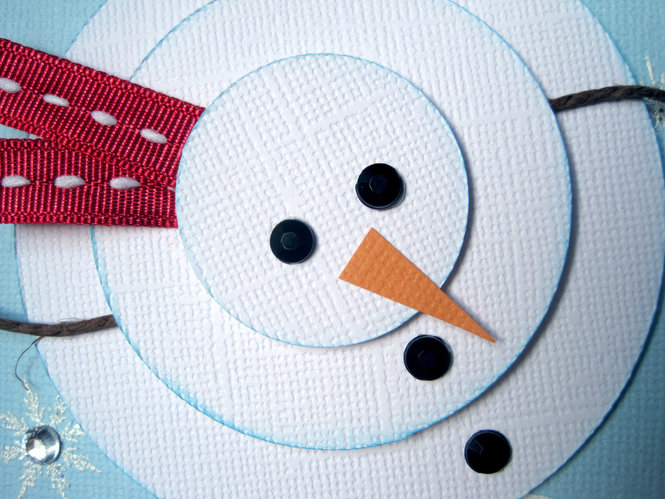
Detail view

A nice bright red ribbon made this little fellow's scarf but I had about five different ribbons that I used so there was a little variety to the set.  For the arms, I decided some dark brown twine would look suitably like branches and add another textural element, which I liked.  And I totally lucked out at the dollar store when I stumbled over massive sheets of colour self-adhering rhinestones, including black!  They were like perfect little chunks of charcoal just waiting for a snowman to adorn!  Serendipity, I tell you.

March 02, 2014

Pinspiration Sunday

Sunday evening again already so I guess it's time for a little Pinspiration.  Go grab your hot beverage of choice and we'll dive in while supper warms up.

Currently:

* watching - Manhunt
* reading - just finished Still Alice (very good - I recommend it)
* making - felted flower and baby quilt
* eating - pizza
* drinking - water
* wearing - jeans & a striped long-sleeve shirt
* weather - foggy and wet, 4C
* feeling - tired
* wanting - a second day to sleep in
* needing - to type up a long documentation
* planning - multi-tasking several sewing projects
* thinking - mulling over Still Alice
* loving - having used my sewing corner at last!
* enjoying - a day in bed with Oskar

And now on to the pins...

When you have a surname like England, you tend to have a real soft-spot for Union Jacks and anything English.  I love the soft colours used in this version.

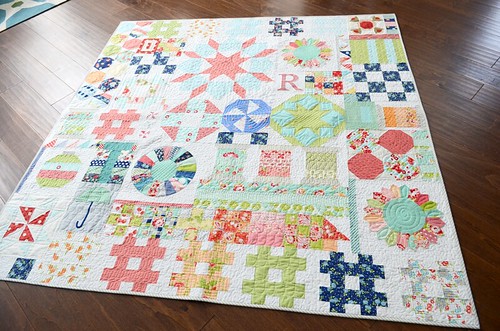
This is such a great idea - use up all of those leftover and tester blocks to make a big sampler-like quilt.  Such a fun idea!

I always find zippers tricky, no matter how many times I put them in.  This site has several tutorials at all stages of the zipper-sewing process and for various needs.  A handy reference.

Move over, sock monkeys - it's time for sock owls!  Super cute and easy to make; I could see these being really fun autumn or Hallowe'en decorations around the house.

I really liked the colour palette of these different washi tapes in the background design and the little mix of embellishments is really cute, too.

Here's fun geometric card that uses heat embossed stamping on a chalkboard background - really eye-catching and lovely.

With spring feeling just around the corner, perhaps it's time to start decorating.  This could be a good project to use up those scraps.

One of my favourite spring flowers is when the magnificent magnolia trees blossom.  I'm really digging these fresh, spring greens; that Pantone radiant orchid pink and the hints of grey blue and deep brown.

Okay, folks - it's a short week this time around; that's all for today!

December 11, 2013

Christmas Cards 2013

Ho ho ho!

So every year I make my own Christmas cards; any where between 30-50 cards.  Normally I start this process in November but if I'm absolutely honest, I didn't get around to starting mine this year until just last week - eek!  Thankfully, I already knew exactly (okay, roughly) what I wanted to do.

You see, I had some inspiration much earlier in the year during the CHA-S previews.  I saw these adorable cameos by Webster's Pages and the Santa moustache totally stole my heart.  I thought to myself, "That's my Christmas card this year."

Totally cute, right?

But I wanted to kick it up a notch and really, what's a moustache without some tickle to it?  So the hunt was on to find just the right 'stach fixins' and after a lot of pain-staking clipping, here's what I came up with:

Yup, Santa Claus is comin' to town!

Crinkly white faux fur for the moustache!  The sentiment is heat embossed in white.  Then to add some magic sparkle, I splattered some white mist, sprinkled some silver star sequins and added some Stickles glitter glue in silver along the diagonal.  The edges are also rubbed with white stamp ink to help ground the design and give the impression of a frosted window.

I have to say, I don't think I've ever come up with a quicker design in previous years and although cutting out the moustaches was tedious and time-consuming, the rest of the card came along quite quickly thereafter - I reckon three days total, plus some time tonight to paste in the interior plaque and DONE!

And incidentally, ever since a friend told me last year that her family rates the Christmas cards they receive and mine is always the winner, it's been a bit intimidating deciding on a design - heh.  I'm feeling pretty confident with this 'entry', as it were.  Fingers crossed!