Hello, hello!
You may recall that I made a cowl for Granny as a Christmas gift. I was so pleased with the choice of wool I used that I wanted to make another for my mum as a Christmas gift. I decided on a pretty blue wool and a lime green chunky accent button, then got crocheting.
One afternoon of work later and I had a finished Christmas gift (always a good feeling). Here's a little detail shot of the button and stitching.
Not sure if it was her sort of 'thing' but at least it was an enjoyable way to spend an afternoon.
And as an aside, Granny loved her cowl. She even wore it on Christmas Day when she was feeling a breeze around her neck sitting next to the heater vent. :)
Showing posts with label crochet. Show all posts
March 04, 2015
March 02, 2015
The Crochet Lite
Hello!
Have you seen these?
Aren't they gorgeous? Just looking at them makes me feel a bit like a bug drawn to the blue light of a bug zapper...
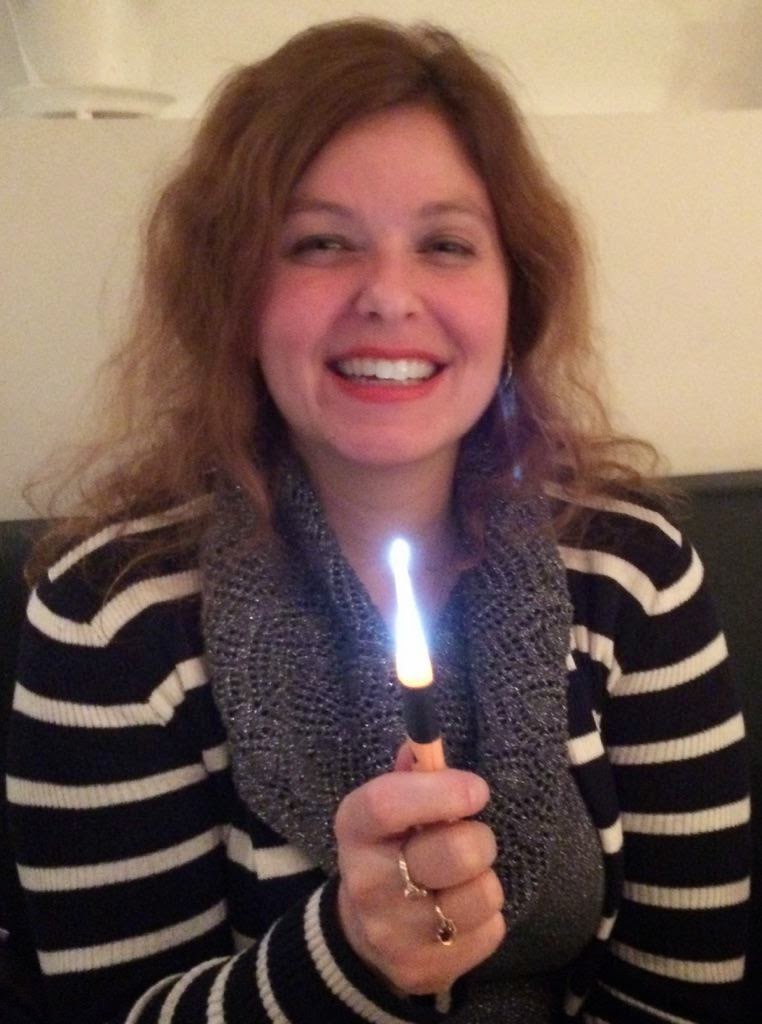
But the even better part? My friend Ingrid bought me three for a Christmas gift!
They are pretty awesome, I must say. I've been crocheting with them the last two months now and I love them. The LED light extends along the whole length of the clear plastic hook and intensifies at the hooked end. They are fabulous for crocheting with dark yarns and the handles with rubber grip are very comfortable. They take three small disk batteries and the battery compartment is easy to access and close again. A quick search online will find you retailers if you want to add them to your collection.
Thanks, Ingrid!
Have you seen these?
![]() |
| The Crochet Lite |
Aren't they gorgeous? Just looking at them makes me feel a bit like a bug drawn to the blue light of a bug zapper...
But the even better part? My friend Ingrid bought me three for a Christmas gift!
![]() |
| Now that's my kind of light saber! |
They are pretty awesome, I must say. I've been crocheting with them the last two months now and I love them. The LED light extends along the whole length of the clear plastic hook and intensifies at the hooked end. They are fabulous for crocheting with dark yarns and the handles with rubber grip are very comfortable. They take three small disk batteries and the battery compartment is easy to access and close again. A quick search online will find you retailers if you want to add them to your collection.
Thanks, Ingrid!
February 22, 2015
My First Amigurumi
Hi, there, welcome back!
If you follow my blog at all, you may vaguely recall that back in September 2014 I learned to crochet. From those first simple crocheted squares, I made several mug cosies, cowls (mine and Granny's) and some simple dish clothes for stocking stuffers. I also had a go at crocheting a wine bottle tote but found it a bit too challenging at the time so decided to revisit that pattern at a later date once I'd had a little more experience under my belt.
However, if you want to do any of the really, really cool and cute stuff with crochet, you really have to learn to master crocheting in the round. I mean, seriously, you have to. And that's a bit daunting when you first start out, because it takes a lot of counting and a different level of spatial orientation ability.
Anyway, one weekend I was completely bored out of my gourd and I decided it was high time I tackled this crocheting in the round. Primarily because I wanted to learn how to make those adorable amigurumi toys. I mean, be honest, how could anyone not want to make these? So I searched through my Pinterest crochet pins and found what I felt would be the absolute basics to get me started: baby monsters.
Now, my original pin took me to a very nice photo-assisted tutorial, but I still found it tricky to fully understand what I was doing and more importantly (especially as I'm a visual learner), to see where I should be hooking. So, back to YouTube I went and to my great joy, I stumbled upon a video tutorial version of these exact baby monsters - yeah! Want to make these yourself? Here's the video I used:
The video is half an hour long and goes through making the monsters from start to finish, including adding the faces (safety eyes, stitching features), stuffing and closing. I felt it was well explained throughout and the one or two times something wasn't directly shown, I was able to figure it out with minimal trial and error. And after an afternoon of excited stitching, I had this little fellow completed:
Isn't it adorable? Squee! I just can't help but squish it every time I see it. I didn't have any safety eyes so I used small buttons, which incidentally were originally white and I coloured them black with a Sharpie marker.
Once you get the basic process down, these whip up super quickly and easily. In fact, I thought they would be the perfect little end of school year treat for my students so now I'm busily crocheting 23 of them! I'm also thinking I'll make a few extras for my classroom as fidgets for students that need to move while listening.
If you follow my blog at all, you may vaguely recall that back in September 2014 I learned to crochet. From those first simple crocheted squares, I made several mug cosies, cowls (mine and Granny's) and some simple dish clothes for stocking stuffers. I also had a go at crocheting a wine bottle tote but found it a bit too challenging at the time so decided to revisit that pattern at a later date once I'd had a little more experience under my belt.
However, if you want to do any of the really, really cool and cute stuff with crochet, you really have to learn to master crocheting in the round. I mean, seriously, you have to. And that's a bit daunting when you first start out, because it takes a lot of counting and a different level of spatial orientation ability.
Anyway, one weekend I was completely bored out of my gourd and I decided it was high time I tackled this crocheting in the round. Primarily because I wanted to learn how to make those adorable amigurumi toys. I mean, be honest, how could anyone not want to make these? So I searched through my Pinterest crochet pins and found what I felt would be the absolute basics to get me started: baby monsters.
![]() |
| OMG, need to make these! |
Now, my original pin took me to a very nice photo-assisted tutorial, but I still found it tricky to fully understand what I was doing and more importantly (especially as I'm a visual learner), to see where I should be hooking. So, back to YouTube I went and to my great joy, I stumbled upon a video tutorial version of these exact baby monsters - yeah! Want to make these yourself? Here's the video I used:
The video is half an hour long and goes through making the monsters from start to finish, including adding the faces (safety eyes, stitching features), stuffing and closing. I felt it was well explained throughout and the one or two times something wasn't directly shown, I was able to figure it out with minimal trial and error. And after an afternoon of excited stitching, I had this little fellow completed:
![]() |
| My Squishie! |
Isn't it adorable? Squee! I just can't help but squish it every time I see it. I didn't have any safety eyes so I used small buttons, which incidentally were originally white and I coloured them black with a Sharpie marker.
Once you get the basic process down, these whip up super quickly and easily. In fact, I thought they would be the perfect little end of school year treat for my students so now I'm busily crocheting 23 of them! I'm also thinking I'll make a few extras for my classroom as fidgets for students that need to move while listening.
November 15, 2014
A Cowl for Granny
Hello, hello!
Recently I made this cowl and really loved the whole crocheting process and how the final project turned out - quick, easy and a beautiful result. I mean, what could be better? So I decided I should make a few for Christmas gifts.
There's this wool shop near my work that I've always been meaning to go into and look around. Unfortunately, as I work ridiculously late into the evening most nights, they're never open when I pass by. However, I finally found some time to pop in and I found this super yummy wool calling out to me:
I don't know what it is with variegated anything but I love it! And this pink/orange/purple combination was just too gorgeous to not go home with me. And they even sell those chunky plastic buttons I adore so I scooped up a paisley-shaped purple one to go with it.
A weekend later and this was the result:
OMG, I'm totally in love! I'm definitely going to need to go back and buy more of that same wool because I seriously need a second cowl like this just for myself.
And this time I made sure the wool was a uniform consistency, which really helped with the ease of crocheting and knowing I was using the correct loops and counting accurately. I also like how you can see the stitch pattern with this one; it adds to the visual interest.
So there's a little Christmas gift for Granny done. Hope she likes it (or I just may roll her for it - ha!) You can also see the cowl I made for my mum for Christmas here.
October 31, 2014
Crocheted Cowl
Hi, there - welcome back!
So having dipped my toe into the world of crochet, I've been itching for a new project - something still at the easy/beginner level but with a bit more spectacular result than the mug cosy (cute as they are). Scarves are always a pretty safe project but I found something that took the boring scarf up a notch: the cowl.
During my quilt guild's exhibition, I bought some beautiful blue and turquoise wool from one of the vendors and decided it was destined to become a lovely autumn cowl. Paired with a chunky hot pink button I'd picked up at my mum's quilt shop before she retired, I sat one Sunday, armed with a 10mm crochet hook and made this:
Squee!
Don't get me wrong, it wasn't as easy as I'd thought - well, the pattern was but the wool was not. What I hadn't realised when I bought the wool was that it was the type at varies in thickness from chunky strand to thread-like width and back again. That lack of uniform strand consistency definitely challenged my budding crochet skills but I persevered through and it all worked out in the end.
I went with the hot pink button to pick up the pops of pink scattered throughout the dye process. It works really well with the natural holes created in the crochet.
Interested in making your own gorgeous autumn cowl? Check out Fibre Flux's Margaret Button Cowl pattern. As I said, it's a very easy pattern - you just need to learn two rows of stitches and you're set. I also loved that she posted a YouTube tutorial at the bottom of the page to show the process; as a beginner and a visual learner, it was just what I needed.
September 21, 2014
Hooked on Crochet!
I'm so excited!
Around New Years this year, my friend Ingrid and I decided that we wanted to learn to crochet. Our plan was to learn from her mum, Birgitta. Well, it's now September and neither of us had really done much about learning to crochet. A couple of weeks ago, Ingrid had her mum show her the basics, then while out in the shops, we came across some cheap crochet hooks and I picked up one and a ball of yarn. There is sat for about the last two weeks.
Well, I finally picked up hook and yarn and with the help of YouTube (seriously, what can't you learn on YouTube these days?!), I taught myself to crochet in a few hours and I've been obsessed ever since! That first night I crocheted to midnight before I convinced myself to put it down and get some sleep. Then the next morning, realising I'd dropped some stitches along the rows, I ripped most of it out and started again (and again and again until I got it right).
Feeling confident in my budding skills, I quickly decided to move on to the double crochet stitch and I did up a second square using just that stitch.
These are the YouTube videos I used to learn the basic stitches - they were very easy to follow with clear instructions and close-up images.
Crochet for Beginners - Part 1: Chain Stitch & Single Crochet Stitch
Crochet for Beginners - Part 2: Double Crochet Stitch, Half Double Crochet Stitch, Triple Crochet Stitch and Slip Stitch
Beginner Crochet #9: Double Crochet Stitch (this was good to learn how to start the second DC row)
Beginner Crochet #12: Slip Stitch
Finally, I was feeling ready to start a small project and learn to read a crochet pattern. I found the perfect choice: a mug cosy! It always irritates me when I go out to restaurants and they serve tea in a glass instead of a mug, which results in uncomfortably hot fingers or wrapping an insecure napkin around the glass. So this little project is going into my handbag for just such occasions.
Very simple to make, it used the chain stitch, single crochet stitch and slip stitch and I learnt how to crochet a button hole, decrease and of course added the button. So pleased with myself!
If you'd like to make your own mug cosy, the free pattern is available here. Note: I skipped the final step of crocheting around the edges, since I was running low on yarn.
Around New Years this year, my friend Ingrid and I decided that we wanted to learn to crochet. Our plan was to learn from her mum, Birgitta. Well, it's now September and neither of us had really done much about learning to crochet. A couple of weeks ago, Ingrid had her mum show her the basics, then while out in the shops, we came across some cheap crochet hooks and I picked up one and a ball of yarn. There is sat for about the last two weeks.
Well, I finally picked up hook and yarn and with the help of YouTube (seriously, what can't you learn on YouTube these days?!), I taught myself to crochet in a few hours and I've been obsessed ever since! That first night I crocheted to midnight before I convinced myself to put it down and get some sleep. Then the next morning, realising I'd dropped some stitches along the rows, I ripped most of it out and started again (and again and again until I got it right).
![]() |
| My first crochet square! |
Feeling confident in my budding skills, I quickly decided to move on to the double crochet stitch and I did up a second square using just that stitch.
![]() |
| Double crochet square. |
These are the YouTube videos I used to learn the basic stitches - they were very easy to follow with clear instructions and close-up images.
Crochet for Beginners - Part 1: Chain Stitch & Single Crochet Stitch
Crochet for Beginners - Part 2: Double Crochet Stitch, Half Double Crochet Stitch, Triple Crochet Stitch and Slip Stitch
Beginner Crochet #9: Double Crochet Stitch (this was good to learn how to start the second DC row)
Beginner Crochet #12: Slip Stitch
Finally, I was feeling ready to start a small project and learn to read a crochet pattern. I found the perfect choice: a mug cosy! It always irritates me when I go out to restaurants and they serve tea in a glass instead of a mug, which results in uncomfortably hot fingers or wrapping an insecure napkin around the glass. So this little project is going into my handbag for just such occasions.
![]() |
| Mug Cosy |
Very simple to make, it used the chain stitch, single crochet stitch and slip stitch and I learnt how to crochet a button hole, decrease and of course added the button. So pleased with myself!
If you'd like to make your own mug cosy, the free pattern is available here. Note: I skipped the final step of crocheting around the edges, since I was running low on yarn.
February 02, 2014
Pinspiration Sunday
Currently:
* listening - radio
* reading - The Persian Pickle Club (haven't quite started yet)
* making - Nice People Nice Things embroidery
* eating - toast & peanut butter
* drinking - water
* wearing - jeans, shirt & cardie
* weather - overcast, 3C
* feeling - philanthropic
* wanting - another weekend day (always)
* needing - in the larger scheme of things, nothing
* planning - Persian Pickle project
* thinking - about future possibilities
* loving - quiet time in bed with Oskar
* enjoying - a warm day with a bit of sunshine
And now on to the pins...
You see that adorable log cabin mini photo there? That's my stock photograph! This mini quilt was made by my mum, Diane England, and some years ago now I photographed a number of her quilts for stock photography purchases (which I sold via my iStockphoto account). I stumbled over its use last week quite randomly but how cool is that? And incidentally, if you like the idea of converting full-sized quilt patterns into minis, check out the article.
Last week I shared with you a new quilter blog I've been enjoying. This week Camille posted a number of cute mini quilt patterns (at a very reasonable cost). I love this puddle jumping one. She also has a cute umbrella one, too.
A handy little organiser for your ironing board to keep your tools sorted while you work. Love the cute little pin cushion, too.
I really liked this take on the family shield concept that was presented in Jen Gallagher's "Make It Meaningful" video from the beginning of the year. The literal shield version Jen made wasn't to my liking but this alternate, more artistic/scrapbook-y version really appeals to me.
Total love! I have a crocheted sock monkey hat similar to this that I wear for yard duty at work - I get so many giggles from the children, although they sadly don't understand the reference to sock monkeys (this generation, eh?!).
Here's a cute idea for an up-coming Father's Day or masculine birthday gift idea - make a glasses case out of a necktie. Pretty spiffy.
Breakfast Brights
And here's a little colour palette inspiration that includes the Pantone 2014 colour of the year: radiant orchid (it even includes orange - how awesome is that? I'm hooked!)
Labels:
caddy,
colour palette,
crochet,
eye glasses,
family shield,
hat,
inspiration,
ironing board,
log cabin,
mini quilt,
necktie,
organiser,
organizer,
owls,
photography,
pinspiration,
pinterest
January 26, 2014
Pinspiration Sunday
Hey there and welcome back to a new year of Pinspiration! To be completely honest, I had planned to post a new set of pins last weekend and then decided I would be lazy. Bad me, but to be fair, I hadn't been online for some time and hadn't really been in touch with what was new out there. That's not been a problem this week so go grab your hot beverage of choice and here we go!
Currently:
* listening - to upstairs neighbours making strange noises above my head...
* reading - catching up on magazine subscriptions
* making - UFO class photo LO
* eating - roast chicken sandwich *Homer drool*
* drinking - water
* wearing - jeans, knit shirt, hoddie
* weather - snowy, -4C
* feeling - warm & cosy
* wanting - 7-day weekends
* needing - to co-ordinate key drop-off with chimney sweeps this week
* planning - next few scrapping & sewing projects
* thinking - as little as possible
* loving - having a 2-day weekend to myself, tucked up in bed
* enjoying - Oskar snuggled next to me
And now on to the pins...
How awesome is this family tree quilt? Of course, it doesn't hurt that it uses both orange and turquoise colour palettes or that it incorporates an owl in the design.
Okay, technically not a pin but I recent discovered Camille's sewing blog and have really been enjoying her work so I'm passing along her link.
OMG, a real reason to use hexies! Okay, forgive me if you're a hexie lover - I am not but I can totally get behind pretty much anything that's made into a cupcake (real or otherwise).
It's that time of year again when folks are making their New Years resolutions so why not document them? I quite liked Celine's take on the concept.
Or perhaps you're more of a summariser and if so, then perhaps this monthly review approach is more your style. I really liked the circular design and the mix of stamps and bits and bobs.
Does anyone actually send out New Years cards? I can't for the life of me remember getting any growing up (but then my memory isn't great at the best of times) so perhaps this is a newer trend I'm not familiar with but either way, I like the split diagonal design of this cad and the layered tag and mini bunting.
Okay, you need to understand that I am utterly rubbish at knitting. Utterly. However, I have this wild hope to learn to crochet this year and I really love the look of crocheted edges on the right quilts.
See now, if I ever do learn to crochet, I can make a whole *stare* of these adorable owls. (Yes, that's right, I worked in the collective noun for a group of owls - I am just that much of a geek.)
And here's a cheery colour palette to share with you today - just love that combination of yellow/orange and turquoise!
December 15, 2013
Pinspiration Sunday
Hey, hey and welcome back to not only another Pinspiration Sunday but the last for 2013! Yes, I will soon be traveling abroad with limited Internet access so this week's pins will have to last you to the New Year when I return. So go grab your hot beverage of choice and enjoy one last Pinspiration for the year.
Currently:
* watching - Ink Masters Live
* making - one last birthday card for the year
* eating - toasted tuna sandwiches
* drinking - water
* wearing - newly hemmed jeans & a jumper
* weather - clear, 7C (tropical for December, eh?)
* feeling - accomplished; all my chores for the day done!
* wanting - enough time to see all friends & family in two weeks
* needing - to buy just a few final gifts tomorrow
* planning - to see Philamina with friends
* thinking - I'm not going to stress over the holidays - it is what it is
* loving - having turned off my alarm clock
* enjoying - the last few days with Oskar before leaving
On to the pins...
How cute is this banner designed quilt? I just adore banners so this was a given. Would make for a fun baby or children's quilt, too.
I love Cindy's quilt designs and fabric/colour choices and this is no exception. Her modern take on the traditional log cabin design is so fresh and pretty. Can you just imagine this in Christmas reds with the grey and white? Just beautiful.
Does your household have a Christmas elf on the shelf? If so, perhaps she or he would welcome a cosy little bed to nap in?
OMG, this fabric tag is so cute it's painful! Honestly, how many of you are already pulling out scraps and sequins right now to make your own?
And these little dress form scissor holders are also adorable and feminine - perfect for a seamstress friend or family member.
Need a simple yet fun project for the kiddies? How about this super easy felt heart garland - snip out little hearts and thread along narrow ribbon. Perfect for tree decoration or anywhere in the house.
And speaking of tree decorating, how about making some felt lights in a rainbow of colours?
I like grid designs and I particularly like the different sizes and shapes in this grid. The different shapes and sizes also work well to feature natural embellishment clusters, journaling or whatever else you wish to include.
I'm not typically a 2-page LO girl but with the holidays and the volume of photos one can easily snap, sometimes a double-pager is just what you need. I do love photo booth strips and they work so nicely with this design.
If you crochet, perhaps you'd like to have a go with making some pretty stars? These are so delicate and beautiful.
I *love* quilts with crocheted edges on them. It's probably one of the big reasons why I'd like to learn how to crochet. This tutorial will show you how.
I totally fell in love with these adorable mice when I saw them last week. I made one (ridiculously quick and easy) for my Secret Santa gift-ee. They would also make fun stocking stuffers or fun extras for place settings at the table.
Fancy yourself a DIY-er and want to save a little cash but still have beautiful decorations throughout your house? Check out these quick, easy and inexpensive ideas.
Hope your holidays are shaping up well to be merry and bright. Wishing you all Christmas cheer!
Labels:
2 page,
banners,
candy canes,
Christmas,
crochet,
double page,
edging,
elf,
felt,
hearts,
inspiration,
log cabin,
mice,
ornaments,
pinspiration,
stars
Subscribe to:
Posts (Atom)