Showing posts with label stars. Show all posts

December 09, 2015

Heritage Photo - Familjen

Hello, hello!

Welcome back to the final installment of my friend's heritage photo project series.  If you've missed the first two layouts in the series, you can find them here and here.  Today we're checking out the last layout, which features a fabulous photo of Bertil with a handmade toy bow and arrow, a portrait of him and the family together.  I have to say, I absolutely adore that bow and arrow photo!


Background is again from Webster's Pages.  This teal woodgrain paper has long been a favourite of mine so it's pretty special that I'm giving the last I have of it away but it was just too perfect with these photos to not use.  This LO also used up the last of that cute ruler washi tape but I managed to eek it out across the bottom.


That little gap in the title between the l and j was the perfect opportunity to add a little embellishment.  I unfortunately hadn't brought my heart punch with me and after many failed attempts at drawing a symmetrical heart the right size with which I was happy, I decided to go for a funkier heart style instead.


Embellishment cluster above that awesome bow and arrow photo - just look at the expression on that adorable face!  The cork star on the right had been an embossing attempt that I wasn't thrilled with on another project but I liked the look of for this one - you have to love when that happens.


And a bit of embellishment at the bottom of the photo to tie it all together.

And that's it!  My friend will be giving these to her brother as a belated birthday gift and I'm eager to hear what his reaction to them is.  Birgitta is thrilled with them at any rate.  Next year we'll work on the lock of hair and photos for her sister.

May 01, 2015

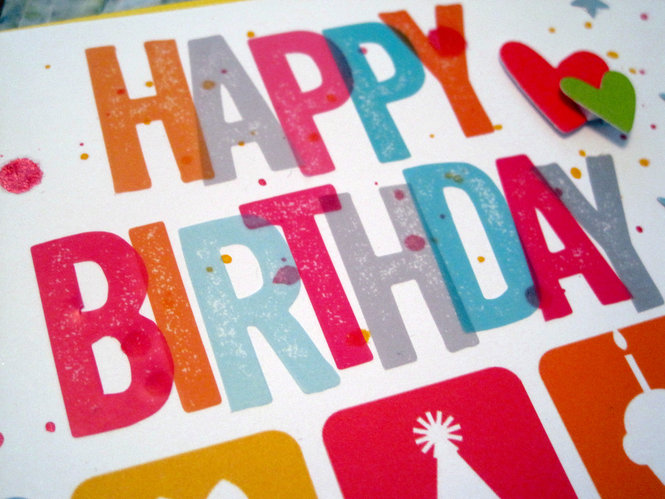
Happy Birthday Party Card

Hello, hello!

I'm sure you won't be surprised to hear this but I've been pretty rubbish lately when it comes to getting cards made on time.  However, when one's gran turns 85, you get your act into gear!  This still didn't quite make it to her on the right day but it wasn't far off - at least it got made before her actual birthday and then it was just down to international mail delivery times.


I used the new Simple Stories SNAP! birthday collection kits - since first trying them out on my Barcelona album, I have to say that I really enjoy using them both for scrapbooking traditional or mini album layouts and also for quick cards.  I loved the bright, cheery colours and the clean, white backgrounds.


My original plan was to use the die cuts from the embellishment pack for the sentiment, as there was a cute little 'happy birthday' in a swagging banner shape but sadly, it wasn't big enough for the white space on the card and it just didn't look right.  But I liked the style of the blocky lettering and stamped effect, which is what inspired me to dig out my Amy Tan Yes, Please transparent sticker letters, which I layered haphazardly to create a similar effect.

Some orange and pink spray mist, star sequins and layered up die cut hearts added to the jovial, party-like feeling.

November 29, 2014

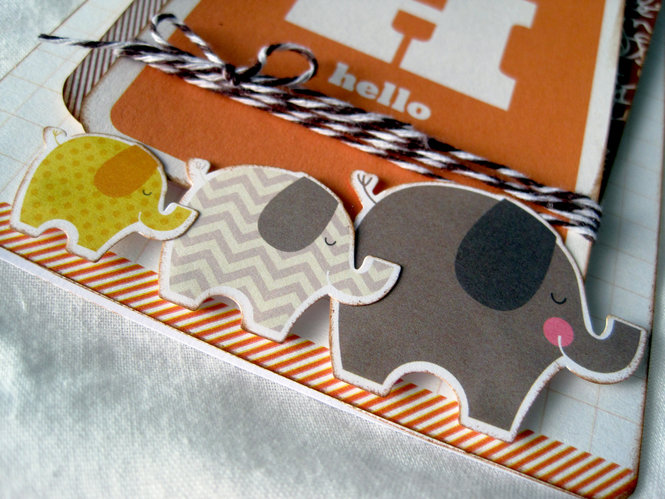
Little One...Hello

Earlier this month friends of mine had a baby boy.  Naturally this meant that a baby card was in order.  I got to work straight away and in very little time came up with this (if I do say so myself - and I do) adorable card.


Now, would you believe that this card was entirely made from supplies from the Project Life baby girl kit?  Yes, indeed.  Everyone I know recently has been having baby girls and so my stash of baby related papercrafting is overloaded with pink, frilly cuteness.  And then suddenly a baby boy.  Well, I was up to the challenge.

I started shifting through the Project Life cards, looking for any non-pink possibilities.  Now, don't get me wrong, I see no problem in little boys having pink things and dolls and I certainly see nothing wrong with little girls having blue things and playing with Tonka Trunks but it's probably safest to play the gender neutral card in these situations.  So...I went with the fab retro orange and brown combination.


The elephants, stars and moon are from the Simple Stories baby girl collection kit and aren't they just the cutest?  I piled the elephants up on the bottom in a little family train.


Having added the elephants, there was suddenly this yellow from the baby elephant that was out of sync with the rest of the design and colour palette so I searched the Simple Stories sticker sheet for a way to bring more yellow into the card.  I found the moon and added some stars to make a visual triangle.  The cork cloud was a nice way of anchoring the stars and adding another texture and dimension of brown at the same time.

Finally - and I didn't take a photo of this part - I added the sentiment inside.  And to my horror, as I was writing out my note to my friends, I misspelt one of the words!  No!  What to do, what to do?  I grabbed for a package of word stickers and found a selection that not only fit with the message but even worked with the colour scheme and completely covered up my faux pas - whew!

August 20, 2014

Persian Pickle Project 2014

Hello, hello!

I'm so excited to be sharing a completed project with you today!  In case you haven't yet noticed, I'm not always (cough, cough - usually) very good about finishing sewing projects...  But this one had a deadline and I usually work well towards deadlines (if you count waiting to nearly the last minute as working well - thanks, Mum).  Anyway, personal foibles aside...

You may recall that at the beginning of the year, my Haberdashery sewing group had decided to do a group project based on the fabric swapping principle behind the book The Persian Pickle Club.  You can find the full details of our project in this post.

In February we made our fabric swaps, which you can read up on in this post.  And here is the photo of all our fabrics together (unsurprisingly, mine is the orange dragonfly print).


Right from the beginning I had an idea of what I wanted to do for a design - a paper pieced circle of geese blocks.  I had intended on using basic white as the background colour but since so many of the fabric contributions were pale or light coloured, a darker background would be necessary.  Except that I didn't want to use black, because it felt very flat so instead I found a mottled brown with warm and cool tints throughout it; it's not really my style but I think it works with the rest of the prints and sometimes you've got to work outside of your comfort zone.

And so...the big reveal!


Ta da!  The wallhanging finishes at 40cm square (as stated in the project requirements).  It features a central circle of geese block in counter-clockwise rotation (yeah, I'd meant to do it clockwise and printed off the wrong pattern by mistake - oops but not the end of the world).  I added a one inch border into which I used some off-cuts of the fabrics to lick & stick tiny geese around the edges using odd numbered groupings and gaps for added interest.

The quilting was a little challenging as my machine is quite old; so old it's been impossible to find a quilting foot that will work with it so I had to go slowly with a regular sewing foot and ease in fabric manually where needed.  My machine can also sometimes have tension issues when quilting but luckily I seemed to find the right combinations of settings this time around.


Originally I had thought to reinforce the circular concept by quilting concentric circles in the center.  Unfortunately you can imagine my dismay (and laughter) when I realised that I'd effectively quilted a bulls-eye into the center of my geese...  Open season, anyone?

Time for Plan B: geese flying by star light.  I stitched in the ditch around the large central star shape and added some additional lines in each arm of the star.  Then I drafted a smaller star template which I quilted into the corners.  For the geese I stitched in the ditch around each goose and then added arched lines on the insides.  I repeated this quilting on the small one inch geese in the borders (not easy, I can assure you).  I also quilted simple geese shapes into the rest of the borders; 12 geese per border, one every inch and some I reversed, again for interest.


The final touch, I recorded the project and contributors on the hanging sleeve on the back.  This Tuesday we will be revealing all of our wallhangings to each other at our next Haberdashery meeting.  Then the whole collection will be put on display at our guild exhibition end of September, which will be exciting.

December 15, 2013

Pinspiration Sunday

Hey, hey and welcome back to not only another Pinspiration Sunday but the last for 2013!  Yes, I will soon be traveling abroad with limited Internet access so this week's pins will have to last you to the New Year when I return.  So go grab your hot beverage of choice and enjoy one last Pinspiration for the year.

Currently:

* watching - Ink Masters Live
* making - one last birthday card for the year
* eating - toasted tuna sandwiches
* drinking - water
* wearing - newly hemmed jeans & a jumper
* weather - clear, 7C (tropical for December, eh?)
* feeling - accomplished; all my chores for the day done!
* wanting - enough time to see all friends & family in two weeks
* needing - to buy just a few final gifts tomorrow
* planning - to see Philamina with friends
* thinking - I'm not going to stress over the holidays - it is what it is
* loving - having turned off my alarm clock
* enjoying - the last few days with Oskar before leaving

On to the pins...

How cute is this banner designed quilt?  I just adore banners so this was a given.  Would make for a fun baby or children's quilt, too.
 
I love Cindy's quilt designs and fabric/colour choices and this is no exception.  Her modern take on the traditional log cabin design is so fresh and pretty.  Can you just imagine this in Christmas reds with the grey and white?  Just beautiful.
 
 Does your household have a Christmas elf on the shelf?  If so, perhaps she or he would welcome a cosy little bed to nap in?

OMG, this fabric tag is so cute it's painful!  Honestly, how many of you are already pulling out scraps and sequins right now to make your own?

And these little dress form scissor holders are also adorable and feminine - perfect for a seamstress friend or family member.
 
Need a simple yet fun project for the kiddies?  How about this super easy felt heart garland - snip out little hearts and thread along narrow ribbon.  Perfect for tree decoration or anywhere in the house.

And speaking of tree decorating, how about making some felt lights in a rainbow of colours?

I like grid designs and I particularly like the different sizes and shapes in this grid.  The different shapes and sizes also work well to feature natural embellishment clusters, journaling or whatever else you wish to include.

I'm not typically a 2-page LO girl but with the holidays and the volume of photos one can easily snap, sometimes a double-pager is just what you need.  I do love photo booth strips and they work so nicely with this design.

If you crochet, perhaps you'd like to have a go with making some pretty stars?  These are so delicate and beautiful.

I *love* quilts with crocheted edges on them.  It's probably one of the big reasons why I'd like to learn how to crochet.  This tutorial will show you how.

I totally fell in love with these adorable mice when I saw them last week.  I made one (ridiculously quick and easy) for my Secret Santa gift-ee.  They would also make fun stocking stuffers or fun extras for place settings at the table.

Fancy yourself a DIY-er and want to save a little cash but still have beautiful decorations throughout your house?  Check out these quick, easy and inexpensive ideas.

Hope your holidays are shaping up well to be merry and bright.  Wishing you all Christmas cheer!

November 24, 2013

Pinspiration Sunday

Hi, everyone and welcome to another lazy Sunday here in my part of the world.  Oskar and I have spent the day lazing about; enjoying what I reckon is the last two-day weekend all to myself for the remainder of 2013.  I'd like to say that I have a lot to show for it but I don't and that's just fine with me.  So, go grab your hot beverage of choice and come enjoy some inspiration.

Currently:

* watching - How I Met Your Mother
* listening - to Oskar snoring
* reading - Papercraft Inspirations Dec. issue
* making - started Picture day 2009 LO
* eating - baked potato, salmon fillet & peas
* drinking - water
* wearing - PJ bottoms and jumper
* weather - clear, 2C
* feeling - full
* wanting - more lazy days like today
* needing - to seriously get working on Christmas cards
* planning - glögg evening with friends next weekend
* thinking - last week of November - eek!
* loving - new birthday card I made yesterday
* enjoying - my new bike, Karin!

And now on to the pins...

I really like this quilt design - the patchwork effect is created by slicing the blocks apart and adding white lattice.  I even love the yellow and grey fabric choices and I'm not normally a yellow/grey gal (but it seems to be growing on me recently).

Do you love the look of on-point block design?  Then perhaps this ruler needs to find its way into your craft room.  Specially designed to precisely cut on-point squares and rectangles, it even includes the seam allowance for you!

I just love this LO - the colour combination in the misting, the chipboard elements, the stitched and real feathers that make the subject appear like an angel.  It's all just so perfectly balanced and beautiful.

Such a great page - love the ombre paper and the pink/red, black and turquoise combination, the accents - just everything.

Here's another quick and easy option if you're still looking for Christmas card inspiration - a little kraft cardstock, some pretty patterned paper leftovers and thickers.

I'm totally into the current shaped paper clip trend right now and these cute little hearts are easy peasy to make from standard North American-style round-edge paper clips.

These little pastel-coloured resin star embellishments are from Freckled Fawn and they are just adorable; perfect for cards and layouts alike.

Here's a little holiday colour palette inspiration to leave with you this week.  Cheers!  Skål!

July 09, 2013

I Can Sleep Anywhere

Went to bed last night planning to spend my morning basking in the glorious sunshine on my balcony, stitching up a new embroidery block.  Instead, I woke up to a completely overcast sky - so disappointing!  However, it was an excellent opportunity to get back to scrapbooking without feeling guilty for not being out in the fine weather.

I got to thinking about the start of this layout over the weekend.  Not that you'd know by looking at the photo, but this is from my recent trip to Barcelona.  It was Good Friday and my girl friend and I were heading back home - unfortunately, there were no direct flights with SAS from Barcelona to Copenhagen so we made a loop around all three Scandinavian countries on the way home!  Barcelona to Oslo, Oslo to Copenhagen and finally Copenhagen to Malmö (that last leg is just a 20 min. train ride, thankfully).  Alice (my friend) marveled at my ability to fall asleep despite noise and everything else so she snapped this photo as documentation.

I don't have a lot of dark coloured papers in my stash but I had recently picked up this Panduro Hobby-brand paper.  It was distressed with a bluish wash around the outer edges so I cut it up and turned the edges into the center to help draw focus into the photo.  The rest of the papers are from Yes, Please by Amy Tan for American Crafts and I added in some vellum to add some softness.  I layered up the word definition strips from Yes, Please, which I thought worked really well to reinforce the story in the journaling.  I also topped the page with a strip of Dear Lizzy white crepe paper border and a pale blue velvet ribbon; I really liked the curtain-like effect it added to the layout and again, more softness, texture and a dreamy quality.  Then I sprinkled a bunch of vellum and blue scrap paper punched stars onto the background with some rhinestones for twinkle.  Oh, and just for some silly fun, I added a few glittery 'z's and an asterisk.  :D


For the title, I wanted the 'anywhere' to be large so I used the new Amy Tan vellum alphas in the turquoise, mixing the lighter and dark letters.  A bit of silver glitter Thickers, Amy Tan again, for the word 'sleep' and some small Basic Grey letters for the rest.  I also stitched with my sewing machine a few times underneath 'anywhere' to literally underline the word.


The pinwheel I made from some Yes, Please paper that has triangles/squares in an uncut pinwheel pattern.  The original was a little large so I trimmed it down to 2" square and then cut along the diagonal lines - super simple - popped in a decorative brad and done.  There was a large bit of negative space in the photo just above the pinwheel that was really bugging me so I stamped out a bit of vellum to tuck into the space.


I also toyed around at including some clear and white chevron transparency but it wasn't working the way I wanted it to.  Then I realised that the little triangles I had cut out along the chevron edge made neat little semi-transparent arrow heads so I stitched them down pointing toward the photo.

And now the weather is back to being sunny and lovely - hurray!