Showing posts with label MME. Show all posts

February 17, 2014

Picture Day 2009

Hello and welcome back!  So it's Monday morning and I'm *not* at work - long live the sports break!  I've been enjoying my time off catching myself up on some embroidery work (I'll share that later in the week) and yesterday I finally dug into the *huge* tower of new photos and scrapbooking goodies so you can expect some regular updates and posts here throughout the week.

However, I've had this UFO from my series of class photos sitting on my scrapping board from around the end of November or start of December.  Now, you have to understand, when it comes to scrapbooking, I pretty much never leave a LO unfinished once started (completely the opposite of my quilting, it seems...)  So clearly, that needed attention first.


In my last 2Peas order, I picked up Chic Tags' new paper line and absolutely fell in love with this bright, bold diagonal stripe paper.  I had been struggling with getting all the embellishments to work on the shelf design but with a fresh set of eyes, I decided to go in a slightly different direction and as is often the case, it worked much better.


The pinwheel I made myself and this LO features a wood veneer camera for the running camera motif in this series.  Some little leftover bits and bobs worked in here, too.


Glammed up the title with some gorgeous turquoise glitter Thickers - I just love these and their larger size works really well with photo enlargements.  I didn't have any letter 'u's left so I snipped apart a 'w', which worked for both the 'u' and the 'r' - how awesome is that?!  Love that little OA 'look' brad, too.


And speaking of brads, I decided it was high time to really start using up some stash and used a whole bunch of OA Travel Girl and MME Notable brads, mixing and matching them together with the clusters.

So with this LO completed, I'm close to being finished this school photo series.  I have one more class photo from years ago, for which I'm struggling to find a good paper combination as despite being a professional job and printing, the colour levels aren't great and there's a slight green weight dulling them and making them look 'bleh'.  Then I need to rescan this academic year's class photo, as I didn't seem to email it to myself and now haven't a clue where I've saved it.  I've also been thinking I should see if I can find a copy of my first class photo from work when I started out as a personal teaching assistant - might have to call in the colleague cavalry for that one.  Still debating on the staff photos...

In any event, I'll be switching things up for a bit as I get to work scrapping Christmas photos from 2013 and I even have a touching Valentine's historical LO I'm piecing together in my head and may actually get done later today.

Stay tuned!

November 22, 2013

Picture Day 2010

Hello again, everyone!  So this afternoon at work was field trip day - two hours of skating at the local arena, reliving my youth spent figure skating and coaching 7 and 8-year-olds how to skate.  We had a blast but boy did we come back tuckered out.  I can safely say that I will be curling up extra early in bed tonight once this post is published!  And of course I will need to snag some of the photos the parents took today to scrap later on.

But today we're back to my current series of class photos through the years.  This time it's my class from three years ago, covering academic year 2010-2011.


I decided to return to the Fancy Pants Down by the Shore collection for my background paper; a yellowish/green, blue and white stripe.  I really like how bright and cheery the tropical papers in this collection are and they work really well for children's-themed LOs.  I added in some MME Oxford Lane paper for a photo matte and a Carta Bella Hello Again journaling card and that cute paper chain people border.  Carrying on the camera motif, I decided to use this awesome camera washi tape from Webster's Pages.

I decided to stack up all of the different borders I had pulled, which gave me space to layer the journaling card on the bottom of the page - a nice change from putting it on top again.  I also decided to take advantage of all that white space at the top of the photo and put the title there and bring the embellishment cluster down into the photo - keeping things tight helps to maintain the focus on the photo and leave some breathing room around the sides.


Also related to the camera motif, I added in some View Master reels.  This embellishment cluster combines some washi tape, stickers, spray mist and a scrap of yellow paper I didn't use on a preview project (don't you just love when that happens?).  I also used one of the Hello Again papers - the black sheet with the funky white text.  I cut out some of the words that I felt related to school and sprinkled them in with the embellishments.


And here is my journaling card with stats.  Some more sprinkled words and View Master Slide, washi tape, spray mist and coloured paper clips.  Having recently watched one of Corrie Jones' videos where she used feather accents on a LO, I was inspired to do likewise so I pulled these out from my Studio Calico Sundrifter pack and I really like the effect - a bit elegant but still having a playful element.

This week I also finally got around to scanning my current year's class photo and also the staff photo so I'll be adding those to my next photo order to round out the series.

September 09, 2013

I Have a Dream...

So yesterday I had a wonderful day spent scrapping, which means today I have a new LO to share with you.  You may remember that about two weeks ago I shared the following photo of supplies with you:


I was all set to start this LO when I suddenly discovered that I hadn't printed the photo like I thought I had so then I had to wait until my new photo order came in.  Anyway, those supplies turned into this:


This beautiful photo realistic chalk pastel paper from Webster's Pages was actually available at the local Panduro Hobby here in Sweden shortly after New Year so I snatched up several sheets of what was available.  This is not my typical style of paper *at all* but I decided I wanted to challenge myself to use it so I've been saving one sheet of it - until now.  A LO about scrapbooking seemed to be the perfect choice for using this paper and I love the soft, pastel colours.


I knew I wanted to have some hidden journaling in the glassine bag and I used my vintage Olivetti to type 'Can you keep a secret?' on the top of the bag.  I actually had a brain wave for most of the journaling the night before in bed so I typed it up on my phone to use later.


For the rest of the LO, I decided to just use a lot of layering and dug into my scrap basket.  There's sort of a little bit of everything in there - corrugated cardstock, labels, patterned papers, a transparency, a banner, washi tape, stickers, etc.  I decided to add the frames while working on the fly and I quite like how they draw your attention into the photo.  Some dimensional embellishments with the cork arrows, the flair and enamel dots.  I also used a 2Peas star paper clip and oh my, such fun!  I can tell I'm going to become obsessed with those...


I also used some word, phrase and number stickers, sprinkled around the page.  I knew the moment I saw that MME phrase sticker, 'Reach, Imagine, Dream' that it was perfect for this LO.  I'm also really loving that Kensei Thickers font.

August 21, 2013

WIP Wednesday

Is it only Wednesday?  This week was the start of lessons with my new class for the academic year and I'm exhausted.  It's been an extremely rough start to the year, I'm sad to say.  However, the one shining star this week was the arrival of my new 2Peas order - yeah!  I'll see about getting a little video together later this weekend to share with you.

In the meantime, I've started pulling some supplies for a new layout I have planned, although I just discovered tonight that I haven't printed the photo like I thought I had.  Hmm.  I'm not the type of person who makes layouts without the photos - I like to work from the photo first, then choose papers and then finally embellishments.  However, I'm sure I can manage for just one layout and it will be an interesting exercise for myself.

Supplies pulled so far:


Buried on the bottom of this pile you might be able to make out this lovely photo-realistic chalk pastels paper by Allison Kreft for Webster's Pages.  I've been wanting to challenge myself to use this side of the paper for a layout for some time now and this is it!  I've also pulled a number of goodies from my new goodie box - exclusive 2Peas star paperclips (smaller than I had assumed), SC cork embellishments as well as FP cork arrows, Thickers in the funky Kensie font, SC Sundrifter die cuts, CP The Pier stickers, MME enamel dots, labels and tile phrases - just to name a few!

I was really hoping to get started on this layout now but after the day I've had today, I just need to sit and veg for a bit.  Look for an update come the weekend, though (with any luck).

July 22, 2013

So Many Happy Memories

Last Wednesday I shared this sneak of some supplies I had pulled for a new layout:


It took me a while to start working on it for two reasons.  First, my initial sketch ideas all seemed to gravitate towards designs that work best with portrait oriented photos and my photo was landscape oriented.  Second, I wanted a design that had flow and avoided the boxy feeling (I've been working with a lot of squares lately, it seems).  Then I realised I could adapt one of the sketches from Shimelle's Hitchhiker's Guide to Scrapbooking by using a large doily and after that, everything fell into place.


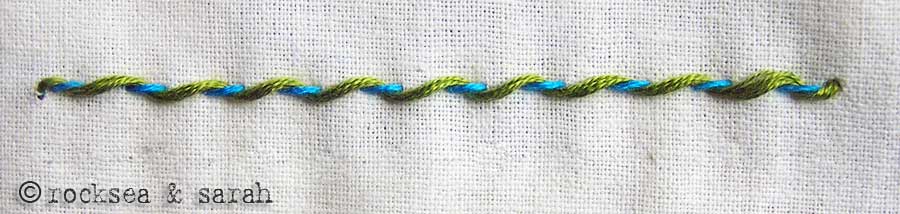
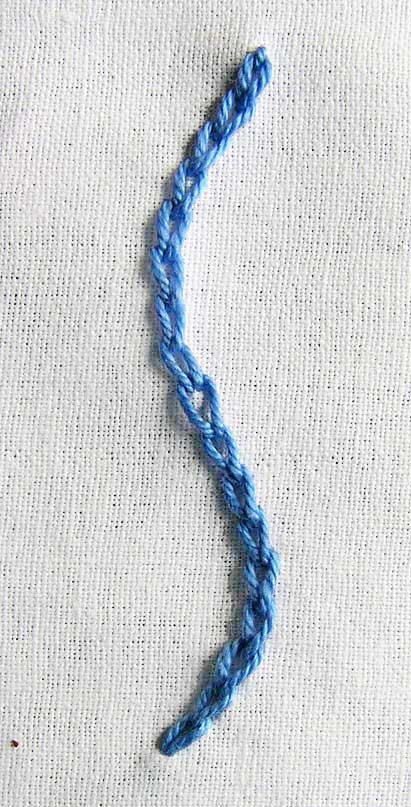
When I put these papers together, I immediately thought of using this photo.  I didn't even remember what the colours were, although it was probably a sub-conscious realisation.  I also wanted to use this lovely, bold floral paper from Oxford Lane.  I'm not one to often use floral designs - I'm more of a geometric girl - but it's so pretty and I like a challenge so I cut it into a circle to lay inside the doily.  I wanted to cover the seam between the paper and doily but didn't have any great ribbon choices so I decided to hand stitch using a fancier embroidery stitch - the chain stitch.  It adds such wonderful texture and dimension to the page and really draws in your eye - here's a detail shot:


I also thought I would carry the floral theme into the embellishments - also not something I normally do but I was recently sent some pretty Martha Stewart large flower embellishments and I have a few flowers left in my stash I thought I would use up.  In the end, I didn't use either of those but instead used this pretty fabric flower, which I paired with a felt bracket that I cut up to look like extra leaves.  I also painted some gold Stickles into the flower's center and leaves to liven up the white space inside the flower.


As it turns out, EP's Here & Now collection actually matches the turquoise, lime and yellows of Oxford Lane quite well so I used the element stickers to embellish a second cluster on the diagonal.  I liked how the cloud stickers had floral motifs in them, then added some arrows and butterflies.  I added more gold Stickles to the large yellow butterfly and to some random dots on the floral background paper.


I wanted to keep the rest of the page simple and airy so I used a banner strip for the title, ran a little embroidery floss along it and used a label to contain my journaling.  I also stamped the date and a sentiment along the right border and then drew a fine doodling line around the other three sides, because the design was feeling like it lacked grounding.

Want to try chain stitching on your pages, too?  I made a short video to help show you how.


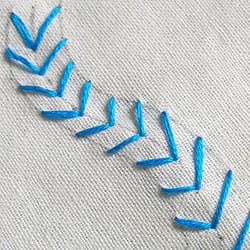
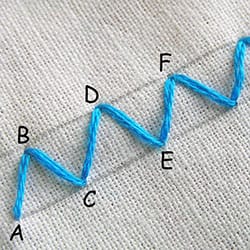
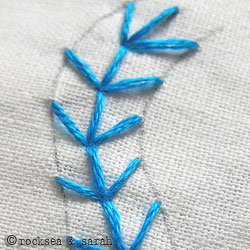
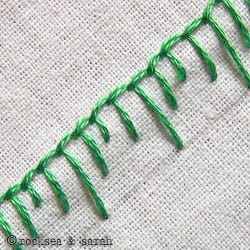
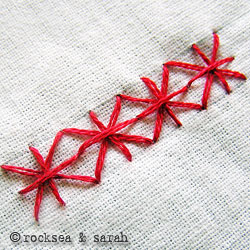
Now, if you like the look of the chain stitching and also like to hand stitch on your pages but have only used the running and/or back stitches, I would encourage you to try some more decorative stitches!  They really add pizzazz to a page and while they often look complicated, many are in fact very simple and transfer well to paper stitching.  You can find a plethora of embroidery stitch photo tutorials from Sarah's Hand Embroidery Tutorials and here are a half dozen beginner level stitches to get you started:


Arrow Head Stitches


Blanket Stitches


Thanks for joining me today and I hope I've inspired you to try some stitching on your next page and if you do, I'd love to see it.

July 19, 2013

Soaking Up the Sunshine from Top to Toe

Do you ever have times when you're working on a layout and you think to yourself, "This is taking forever - what's wrong with me?!" and then you have days when you think to yourself, "I've been at this for hours - I love it!"  Well, this new layout is totally that second one - guess I was just really feeling the creative groove yesterday.


The inspiration for this layout came from one of the starting points from Shimelle's Hitchhiker's Guide to Scrapbooking class, which I'm currently working my way through.  I have a particular weakness for designs that use layered up stripes of patterned paper; it's one of my favourite designs that I'm happy to go back to and scraplift repeatedly.  The colour scheme inspiration for this page actually came from one of the photos I took at this beach, that featured the pretty sun umbrellas in a soft, candy floss pink, which lead to the monochromatic palette.  I knew I wanted to use a variety of arrows but the heart motif that repeats around the page was complete serendipity again (until I realised just how much had hearts on it and then I ran with it).

I actually started first by designing the central embellishment for the page - the twine flower sun.  The lovely cream/gold twine was actually sent to me in a package and I paired it with some gold sewing thread in my stash.  Then I used this tutorial to create the twine flower, layered up a patterned MME brad through the eyes of a shiny yellow button and popped it on top of the flower.


Then I got to work on the page design.  At first I didn't think I had much soft pink in my stash but to my surprise, I actually had more than enough and decided to use up those scraps.  The original starting point was quite linear and I wanted this page to have a breezier, airy feel about it so I tilted the paper stripes and staggered their heights and layered the washi tape borders underneath the stripes so it just peeks out here and there.  Since I wanted the sun to be the focus of the design, I separated out the photos and got to work on that long title (there is something wonderful about long titles, isn't there?).

Finally, embellishment clusters.  I used a variety of Amy Tan/AC, EP, MME, BG and Simple Stories items and I punched little gold hearts from some gold ribbon tape, also saved from the same package as the twine - I seriously need to buy myself some of that.  I also discovered the cute banner paper from EP's Hello Summer collection features a number of pink banners, including one that reads, "I have sunshine in my heart today." - perfect!  Snipped those out and layered up with some dimension on the top, then used an Amy Tan/AC branding stripe with adorable pink hearts to ground the page.


I haz a happy.  <3

July 17, 2013

WIP Wednesday

So I have a few things going on in the craft department lately.  The largest is the age-old issue of organisation and functionality and at the moment, it's my scrapbooking supplies and process that needs the most help.  I have a reasonably small flat - a very comfortable size for just the cat and I but no spare room that can be used for crafting purposes.  This means that my supplies are spread out between the lounge and kitchen - the majority of the stash and stuff I'm not using at the moment is stored in various nesting baskets in the lounge while my current stash is in one big basket on the kitchen table, where I work.  I've also realised recently that I do most of my scrapping standing up these days.

So, I'm toying with the idea of buying a moveable kitchen island that I can use to scrap standing up and can choose whatever room in which I want to work.  I like the look of the Ikea Förhöja - a decent sized table top, drawers and two shelves.  I'm also thinking I could install some rails on either side to hang organisational pails and such.


To test out this theory, I spent Monday scrapbooking on my ironing board, which I set up at the same height as the förhöja island and it's nearly identical in measurements on the top.  It went quite well.  A very comfortable height and while I would love for a little more table top space, I think this will be a flexible solution, especially if I get the rest of my supplies stored better.  My lounge features a large Expedit-like shelving unit so I'll see about getting some baskets and perhaps pretty tins to fit into the bottom squares and possibly the famous ol' Raskog cart for extra storage and portability, which should fit nicely between my old computer desk and wall.

I also have designs for two new scrapbooking layouts rolling around in my head right now.  One uses the rest of my Kate & Co. Oxford Lane papers, which I discovered through chance while sorting through papers on Monday during tidy-up that they match beautifully with an Elle's Studio and Lily Bee Designs paper I bought in my last shopping spree - sweet!  I love when serendipity happens like that.  Here's a quick shot of some of the supplies I've pulled:


And finally, I've been making some more progress on my Albertan Relief quilt blocks.  I got the second green block sewn up last weekend.  Still need to do a second orange block and I definitely have enough red scraps to do one more red one, too.  Hopefully I can get those whipped up before next week so I can ship them off to where they're needed most and not laying around hogging up my ironing board (since it's apparently now doing double-duty...).  Here's the new green block:


Oh!  And I nearly forgot, I'm taking two scrapbooking classes!  I took advantage of the recent 2Peas 20% sale and bought access to Shimelle's Hitchhiker's Guide to Scrapbooking and Amy Heller's Through the Kaleidoscope classes.  I've decided I'm going to focus on one at a time and I'm starting with Hitchhiker's, because I always think it's important to review the basics (and I adore Shimelle :P ) but I'm super geeked to check out Amy's colour theory class afterwards.  Right now I'm enjoying a chapter a day and I think one of the sketches from chapter two will be put to good use with the second layout that's mulling in my head at present - fingers crossed!  And Wilna mentioned in yesterday's In the Mood to Scrap video that she'll be releasing an Art Class II this autumn - how exciting!  Her current one is still on my wishlist but you can be sure it will be the next class (or set of classes, now it seems) that I take.

July 16, 2013

Are You Ready for Adventure?

So last year my Granny came to visit me in Sweden.  It was a pretty big deal, considering she was 82-years-old and the first member of my family to visit me in the 10 years I've lived here.  Needless to say, I documented every day we spent together and then worked my butt off creating identical albums for the both of us to remember this special time together (I gave her her copy as a Christmas gift - she loved it).

Anyway, having taken Shimelle's Cover to Cover class (which I highly recommend, btw), I've been keenly aware that I needed a page to link my annual 2012 and my Our Story: Sweden 2012 albums together.  Without this link, I have a huge gap in my annual album, which is obviously not representative of reality.  I just hadn't figured out how to make the link, since I didn't want to re-create another identical page as the first page in my upgrade album to live in my annual album.

Then I remembered that I had a second shot of that same photo already printed and that I'd pre-pulled the fabulous map print from Allison Kreft's Composition & Colour series and Amy Tan's text border stripe from Yes, Please - the beautiful pastel colours work wonderfully together so I got down to work yesterday and came up with this:


Initially I had intended to use an OA Cakewalk teal/green grid print for the background but then I spied this adorable Little Yellow Bicycle cloud print that I've always adored (and bought like 4 pages because I loved it so much) and I knew I had to use it.  I love how the combination of sky/cloud and rotated map print gives the impression of looking down while flying, which I thought was rather fitting for the topic of flying overseas.  In fact, I had originally planned for the map square to be straight but when I saw it askew on my work table, I loved how much more interesting the page became.  I was also very happy to finally use this chevron arrow transparency, also by Allison Kreft - I bought it a few months ago and every time until now that I've tried to use it, it just disappears in the busy patterns/colours of the paper I've tested it on.


I'm also making a conscious effort to start using my BG Knee Highs & Bow Ties chipboard pieces and I broke into my new MME word stickers for the title.  You can't see it here but on the opposite side I needed the word 'for', so I had to cut it out of a phrase but it works well regardless.  I was also pleased to have another opportunity to use these green flocked Thickers - they were sent to me as a free gift from a magazine and to be honest, I really dislike them.  Green is my least favourite colour so they don't get used much but I like how they work in this design so bonus points, indeed!


One more detail shot to leave you with for today.

July 09, 2013

I Can Sleep Anywhere

Went to bed last night planning to spend my morning basking in the glorious sunshine on my balcony, stitching up a new embroidery block.  Instead, I woke up to a completely overcast sky - so disappointing!  However, it was an excellent opportunity to get back to scrapbooking without feeling guilty for not being out in the fine weather.

I got to thinking about the start of this layout over the weekend.  Not that you'd know by looking at the photo, but this is from my recent trip to Barcelona.  It was Good Friday and my girl friend and I were heading back home - unfortunately, there were no direct flights with SAS from Barcelona to Copenhagen so we made a loop around all three Scandinavian countries on the way home!  Barcelona to Oslo, Oslo to Copenhagen and finally Copenhagen to Malmö (that last leg is just a 20 min. train ride, thankfully).  Alice (my friend) marveled at my ability to fall asleep despite noise and everything else so she snapped this photo as documentation.

I don't have a lot of dark coloured papers in my stash but I had recently picked up this Panduro Hobby-brand paper.  It was distressed with a bluish wash around the outer edges so I cut it up and turned the edges into the center to help draw focus into the photo.  The rest of the papers are from Yes, Please by Amy Tan for American Crafts and I added in some vellum to add some softness.  I layered up the word definition strips from Yes, Please, which I thought worked really well to reinforce the story in the journaling.  I also topped the page with a strip of Dear Lizzy white crepe paper border and a pale blue velvet ribbon; I really liked the curtain-like effect it added to the layout and again, more softness, texture and a dreamy quality.  Then I sprinkled a bunch of vellum and blue scrap paper punched stars onto the background with some rhinestones for twinkle.  Oh, and just for some silly fun, I added a few glittery 'z's and an asterisk.  :D


For the title, I wanted the 'anywhere' to be large so I used the new Amy Tan vellum alphas in the turquoise, mixing the lighter and dark letters.  A bit of silver glitter Thickers, Amy Tan again, for the word 'sleep' and some small Basic Grey letters for the rest.  I also stitched with my sewing machine a few times underneath 'anywhere' to literally underline the word.


The pinwheel I made from some Yes, Please paper that has triangles/squares in an uncut pinwheel pattern.  The original was a little large so I trimmed it down to 2" square and then cut along the diagonal lines - super simple - popped in a decorative brad and done.  There was a large bit of negative space in the photo just above the pinwheel that was really bugging me so I stamped out a bit of vellum to tuck into the space.


I also toyed around at including some clear and white chevron transparency but it wasn't working the way I wanted it to.  Then I realised that the little triangles I had cut out along the chevron edge made neat little semi-transparent arrow heads so I stitched them down pointing toward the photo.

And now the weather is back to being sunny and lovely - hurray!

June 20, 2013

June Haul - A Video Experiment

So today I decided to take on a little experimental video project - that's right, I played around at making my first ever video.  It's nothing special or ground shattering; it's pretty much just a run of the mill haul video (boy, am I selling this to you or what?).  There is a little back story or two behind it, though, so perhaps that will help to perk your interest and if nothing else, I would love to get some feedback on how I did and suggestions for improvements.  It's been a real learning curve, figuring out how to best set up my tripod for shooting, dealing with a dead camera battery and subsequently editing/merging the two videos together, the long saving and long uploading process...  But here it is!


Okay, so time for a little self-reflection.  I think I babbled too much and really shouldn't have gone through all the papers to the extent that I did.  I also need to remember to keep the products on the table or just barely above them so they fit into the shot and don't blur.  I should also probably close the window to avoid the train noise but today was just too hot to do that.

I also promised in the video that I would link up some of my work I referenced.  Here are my two recent projects featuring the MME Oxford Land papers I've been using.


I'd also like to take a moment to give a hearty note of thanks to Shimelle Laine for her very generous NSD challenges and prize opportunities.  Last month I took part in many of her challenges and I was thrilled to be randomly selected as the winner for the Scrap About Yourself challenge with this LO:


Earlier in the week I received an email from Shimelle about the prize - free entry into not just one but two of her upcoming online classes!  The first is her already announced Masterclass on layering - sounds perfect for me; I like to layer!  The second is a yet to be announced online class through her website - no title yet but I'll keep the details she mentioned to myself right now, as I'm not sure how much she wants revealed at this point but it sounds awesome!  It was the perfect start to my summer holidays, since I'd been planning to take another of her classes.  I'm super stoked and can't wait to start!  I just hope they open up now over the summer so I can really focus on them.  Thanks again, Shimelle!

And finally, I'll share some photo love from my quilt guild's recent trip around Småland last Sunday.  We began by driving up to a jam-packed little shop just outside of Perstorp (in the woods).


As you can see, many lovely creations on display.  I bought a handbag pattern and a set of Marmalade candy pre-cuts to use with it and also three FQs in black, white and a silvery grey for a penguin doll we'll be making for guild.
Next we drove foreeevvverrrrr (or so it seemed) to a golf club for lunch (scrummy food, definitely worth it) and then headed off to the Sprätthonsen quilt exhibition, held is this truly beautiful old barn.  A few of my favourite photos:


Finally, we visited Tyger & Ting quilt shop, where they also had a number of samples on display but I particularly love their back porch display:


I was reasonably well-behaved and 'only' bought two charm packs and a tulip table runner pattern (yes, I know I still haven't made the tulip runner I bought from them last year but this one is different...).  They also threw in a free partial pattern for a runner adaptation of Garden Fence, which is how I stumbled across Cindy's great blog, Hyacinth Quilt Designs (check the links list to the right) - a girl after my own heart and such a great name, too!  Here's the photos of my 'hauls' from this day:


I'm thinking that I might use the Aspen Frost charm pack for the Garden Fence runner and if I start it over the summer, I might actually have it done by the time the holidays roll around (or not)!