Showing posts with label chain stitch. Show all posts

September 21, 2014

Hooked on Crochet!

I'm so excited!

Around New Years this year, my friend Ingrid and I decided that we wanted to learn to crochet.  Our plan was to learn from her mum, Birgitta.  Well, it's now September and neither of us had really done much about learning to crochet.  A couple of weeks ago, Ingrid had her mum show her the basics, then while out in the shops, we came across some cheap crochet hooks and I picked up one and a ball of yarn.  There is sat for about the last two weeks.

Well, I finally picked up hook and yarn and with the help of YouTube (seriously, what can't you learn on YouTube these days?!), I taught myself to crochet in a few hours and I've been obsessed ever since!  That first night I crocheted to midnight before I convinced myself to put it down and get some sleep.  Then the next morning, realising I'd dropped some stitches along the rows, I ripped most of it out and started again (and again and again until I got it right).

My first crochet square!

Feeling confident in my budding skills, I quickly decided to move on to the double crochet stitch and I did up a second square using just that stitch.

Double crochet square.

These are the YouTube videos I used to learn the basic stitches - they were very easy to follow with clear instructions and close-up images.

Crochet for Beginners - Part 1: Chain Stitch & Single Crochet Stitch
Crochet for Beginners - Part 2: Double Crochet Stitch, Half Double Crochet Stitch, Triple Crochet Stitch and Slip Stitch
Beginner Crochet #9: Double Crochet Stitch (this was good to learn how to start the second DC row)
Beginner Crochet #12: Slip Stitch

Finally, I was feeling ready to start a small project and learn to read a crochet pattern.  I found the perfect choice: a mug cosy!  It always irritates me when I go out to restaurants and they serve tea in a glass instead of a mug, which results in uncomfortably hot fingers or wrapping an insecure napkin around the glass.  So this little project is going into my handbag for just such occasions.

Mug Cosy

Very simple to make, it used the chain stitch, single crochet stitch and slip stitch and I learnt how to crochet a button hole, decrease and of course added the button.  So pleased with myself!

If you'd like to make your own mug cosy, the free pattern is available here.  Note: I skipped the final step of crocheting around the edges, since I was running low on yarn.

July 22, 2013

So Many Happy Memories

Last Wednesday I shared this sneak of some supplies I had pulled for a new layout:


It took me a while to start working on it for two reasons.  First, my initial sketch ideas all seemed to gravitate towards designs that work best with portrait oriented photos and my photo was landscape oriented.  Second, I wanted a design that had flow and avoided the boxy feeling (I've been working with a lot of squares lately, it seems).  Then I realised I could adapt one of the sketches from Shimelle's Hitchhiker's Guide to Scrapbooking by using a large doily and after that, everything fell into place.


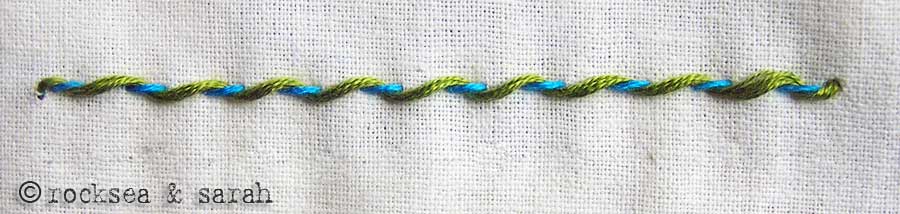
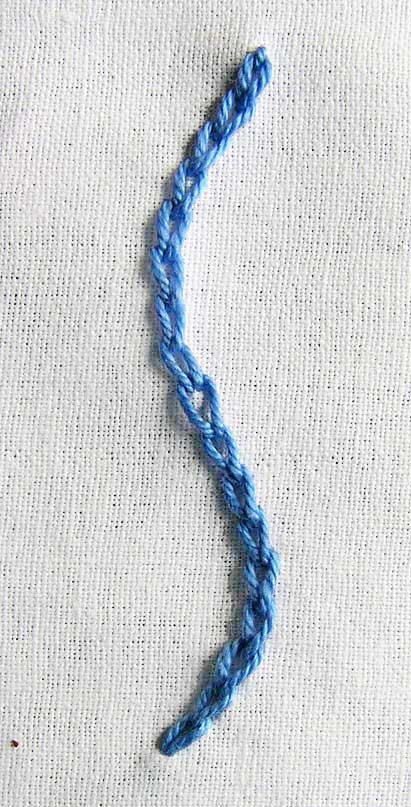
When I put these papers together, I immediately thought of using this photo.  I didn't even remember what the colours were, although it was probably a sub-conscious realisation.  I also wanted to use this lovely, bold floral paper from Oxford Lane.  I'm not one to often use floral designs - I'm more of a geometric girl - but it's so pretty and I like a challenge so I cut it into a circle to lay inside the doily.  I wanted to cover the seam between the paper and doily but didn't have any great ribbon choices so I decided to hand stitch using a fancier embroidery stitch - the chain stitch.  It adds such wonderful texture and dimension to the page and really draws in your eye - here's a detail shot:


I also thought I would carry the floral theme into the embellishments - also not something I normally do but I was recently sent some pretty Martha Stewart large flower embellishments and I have a few flowers left in my stash I thought I would use up.  In the end, I didn't use either of those but instead used this pretty fabric flower, which I paired with a felt bracket that I cut up to look like extra leaves.  I also painted some gold Stickles into the flower's center and leaves to liven up the white space inside the flower.


As it turns out, EP's Here & Now collection actually matches the turquoise, lime and yellows of Oxford Lane quite well so I used the element stickers to embellish a second cluster on the diagonal.  I liked how the cloud stickers had floral motifs in them, then added some arrows and butterflies.  I added more gold Stickles to the large yellow butterfly and to some random dots on the floral background paper.


I wanted to keep the rest of the page simple and airy so I used a banner strip for the title, ran a little embroidery floss along it and used a label to contain my journaling.  I also stamped the date and a sentiment along the right border and then drew a fine doodling line around the other three sides, because the design was feeling like it lacked grounding.

Want to try chain stitching on your pages, too?  I made a short video to help show you how.


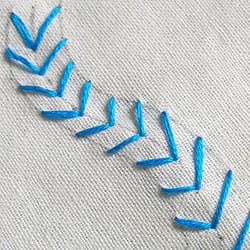
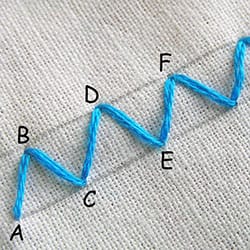
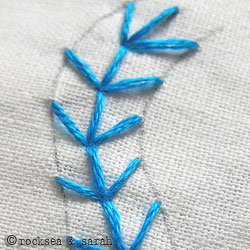
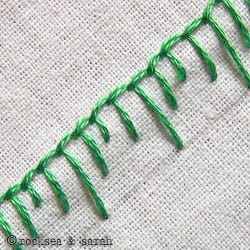
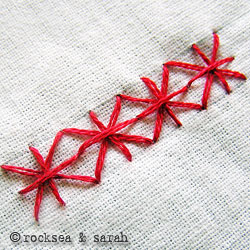
Now, if you like the look of the chain stitching and also like to hand stitch on your pages but have only used the running and/or back stitches, I would encourage you to try some more decorative stitches!  They really add pizzazz to a page and while they often look complicated, many are in fact very simple and transfer well to paper stitching.  You can find a plethora of embroidery stitch photo tutorials from Sarah's Hand Embroidery Tutorials and here are a half dozen beginner level stitches to get you started:


Arrow Head Stitches


Blanket Stitches


Thanks for joining me today and I hope I've inspired you to try some stitching on your next page and if you do, I'd love to see it.

July 21, 2013

Pinspiration Sunday

Sunny evening, everyone!  We've been enjoying some truly lovely summery weather the last few days, which means I've been busy juggling crafting with soaking up some R&R.  Although if I'm honest, the crafting has been winning out over the sunshine; something I should rectify soon.  So, you know the routine - go grab your hot beverage of choice and cozy up to some photo love.

Currently:
* watching - Bones, premiere episode
* reading - Papercraft Inspirations, August issue
* making - many pretty paper things :P
* eating - homemade, grilled hamburgers - YUM!
* drinking - water
* wearing - tank top and shorts
* weather - clear and sunny, 22C
* feeling - excited to play with a new toy
* needing - to finish the 2 blocks for Albertan Relief & buy a new bike (urgently)
* planning - to re-organise my scrapbooking supplies
* thinking - I need to be out in the sun more
* loving - my current creations
* enjoying -  looking forward to Haberdashery sewing group

Now, on to the pins:


How beautiful is this quilt?  I love the soft, sparkly colours on the pure white background and the interest and movement that the uneven border adds.


This website has tonnes of embroidery stitch photo tutorials with easy-to-follow instructions.  This site will be popping up again soon but I thought I'd share now in the hopes that you find some lovely new stitches to try on your next project, sewing or papercrafting.


How cute is this idea?  I like the mason jar trend but I've never invested in any of the papers or stamps, etc.  I think Senoritascapper has used her jars wonderfully, though, and it makes me want to scraplift this adorable page.


This page is so whimsical.  I love the background of branding stripes and the flourish of simple, white butterflies, perfectly positioned but it's the glitter ombre letter stickers that really bring this page together.  Stunning.


There is something I love about stripes and especially diagonal stripes and the combination that Laura has used here with circles is so striking.  I love that single pop of blue.


Yes, you read that right - Ikea!  I couldn't believe it myself but it appears that they now have a gift wrap and stationery line (or that's been the case for a while and I've only just noticed now - entirely possible).  Anyway, the tapes come in sets of four in pink, blue, green or black.  I'm not sure if the quality is washi-style or decorative cello tape and my local Ikea doesn't have them in stock currently but I'm looking forward to investigating further.


If you missed it last week, I used this tutorial to make a neat twine flower for a scrapbooking page.  It's actually ridiculously easy and they make lovely accents for papercrafting or could be sewn onto handbags or the like.


And because I love orange and I've been getting into greys these days, I had to share this lovely colour palette - it just makes me happy and warm inside.