Hello there!
Another recent card make to share today, this time for a friend who turns 50 this year (and for once, I'm not late with this card - whoot!).
Technically this is a scrap-lift of a card design a did a few years ago but I loved the way it worked out so just went with it. I used up some older October Afternoon Cakewalk papers and paired them with some Pebbles chipboards and stickers from the From Me to You and a Valentine's collections. How adorable is that little bird? And of course a 50th birthday needs a little gold bling, so the glittery gold Thickers made a reappearance.
Showing posts with label chipboard. Show all posts
April 09, 2016
January 09, 2015
Monochromatic Birthday Card
Hi there!
I have a new card to share with you today. If I'm entirely truthful, I started this card with the best of intentions and then after deciding on the card base and the tab sticker, didn't know where I was going with it and set it aside...for a few months. Oops.
But determined as ever to catch myself up on back-logged cards, I dug it out and finished it nonetheless!
The approach I finally decided on to finish it? Very simple: just keep adding and layering! Sounds silly, I know but I really enjoyed putting together this hodge podge of emphemera - banner, washi tape, View Master slide reel, mustache sticker, brads, die-cuts, chipboard, staple, letter sticker accents - just go crazy and pile it all on!
Here's a little close-up of the layering. And you know, that October Afternoon bear brad in the top right corner up there? I never really liked it when I first saw it and now, I think it's pretty awesome. Go figure.
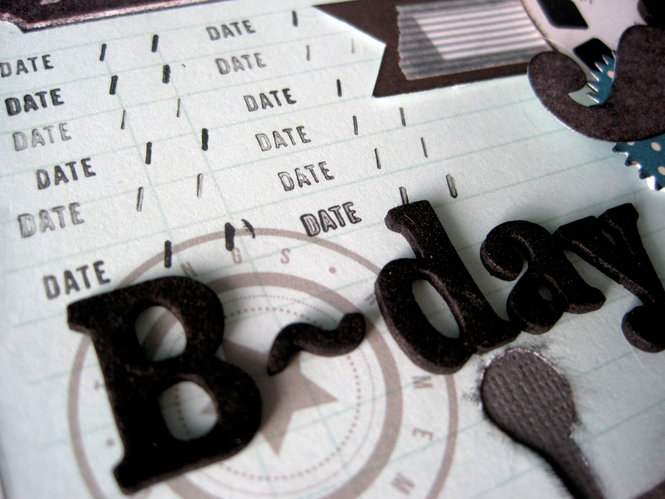
With all the layering on the right side, there was a heavy lack of balance on the left side so I filled up the space with some repeated date stamping.
So the next time you find yourself stuck with what to do for a card, why not try the just add and layer until you can't anymore approach?! It just might work for you, too.
I have a new card to share with you today. If I'm entirely truthful, I started this card with the best of intentions and then after deciding on the card base and the tab sticker, didn't know where I was going with it and set it aside...for a few months. Oops.
But determined as ever to catch myself up on back-logged cards, I dug it out and finished it nonetheless!
The approach I finally decided on to finish it? Very simple: just keep adding and layering! Sounds silly, I know but I really enjoyed putting together this hodge podge of emphemera - banner, washi tape, View Master slide reel, mustache sticker, brads, die-cuts, chipboard, staple, letter sticker accents - just go crazy and pile it all on!
Here's a little close-up of the layering. And you know, that October Afternoon bear brad in the top right corner up there? I never really liked it when I first saw it and now, I think it's pretty awesome. Go figure.
With all the layering on the right side, there was a heavy lack of balance on the left side so I filled up the space with some repeated date stamping.
So the next time you find yourself stuck with what to do for a card, why not try the just add and layer until you can't anymore approach?! It just might work for you, too.
Labels:
banner,
birthday,
black,
blue,
brads,
chipboard,
date stamp,
die-cuts,
emphemera,
grey,
label sticker,
layering,
letter stickers,
masculine,
monochromatic,
slide reel,
staples,
washi tape
June 20, 2014
Hexie Birthday Wishes
I am sooo behind in card making it's honestly embarrassing. However, I did whip up a quick little birthday card for a friend last month and just haven't gotten around to posting it.
Since I've been in a bit of a crafty funk lately, I pulled out a free kit from Papercraft Inspirations. I really like the look of hexagons but don't have a punch so I fussy cut them from some hexagonal paper. Then I layered up some chipboard flowers, bird and sentiment and added a few sequins for some sparkle. Finally, a little black pen outline around the edges to keep everything grounded.
Nice and easy... Just like getting back into blogging. ;) FYI, I spent today working on a little surprise that I'll be able to share next week so stay tuned!
February 14, 2014
Just Saying...Thanks
Hello and TGIF! Not only is it Friday, but in my world, it's sports break! Here in Sweden, sports break is our version of spring break, except everyone travels to go downhill skiing. Except me. I hole myself up in my flat and try to recuperate from having traveled over the Christmas break. It's a truly wonderful time of the year. :P
I've been slowly flexing my crafting muscles again after the winter holidays break and I've made up a few much-needed thank you cards. Let's take a look, shall we?
First of all, I'd like to say that I'm totally and utterly smitten with Pebbles' From Me to You collection. If you're a card-maker, this collection is absolutely a must-have! I've found that I keep turning to it time and time again and it's wonderful for all sorts of cards from birthdays to thank-yous.
I drew a fair bit of colour inspiration from the February 2Peas mood board; specifically the pink and chalkboard elements, plus a bit of freehand doodling.
This first card is for a colleague from work whom is also my wonderful yoga instructor who will soon be moving to Switzerland. I wanted to make sure she got a card before she left.
Despite having photographed it in natural daylight, the colour is a touch off and the chalkboard looks more brown than black but I can assure you it is very black in real life. This was in fact the design that kept me up most of a night. Everything is layered with some messy black thread on the bottom to give some added interested, texture and fill some of the white space. The black enamel dots really helped make everything pop and the doodled line around the edge grounds the design.
I also needed a second thank you card for a friend who helped cat-sit Oskar during the bathroom renovation from Hell and over the winter holidays while I was away. Rather than re-invent the wheel, I took the same design as above and made a second card.
I've been slowly flexing my crafting muscles again after the winter holidays break and I've made up a few much-needed thank you cards. Let's take a look, shall we?
First of all, I'd like to say that I'm totally and utterly smitten with Pebbles' From Me to You collection. If you're a card-maker, this collection is absolutely a must-have! I've found that I keep turning to it time and time again and it's wonderful for all sorts of cards from birthdays to thank-yous.
I drew a fair bit of colour inspiration from the February 2Peas mood board; specifically the pink and chalkboard elements, plus a bit of freehand doodling.
This first card is for a colleague from work whom is also my wonderful yoga instructor who will soon be moving to Switzerland. I wanted to make sure she got a card before she left.
I also needed a second thank you card for a friend who helped cat-sit Oskar during the bathroom renovation from Hell and over the winter holidays while I was away. Rather than re-invent the wheel, I took the same design as above and made a second card.
Again, all layered with the chalkboard banner and a chipboard tag and some floral stickers. I also added a chipboard bouquet and some embroidery floss for the fibre element. Another doodled edge to ground the image. On the inside of the card I've added a little glassine bag, in which I'll add a personal note and an extra surprise.
I've linked up available supplies for both cards to my 2Peas account - just click through the links below the pictures if you're interested in seeing what I used and the manufacturers.
Labels:
cards,
chalkboard,
chipboard,
mood board,
thank you,
thanks,
thread
November 29, 2013
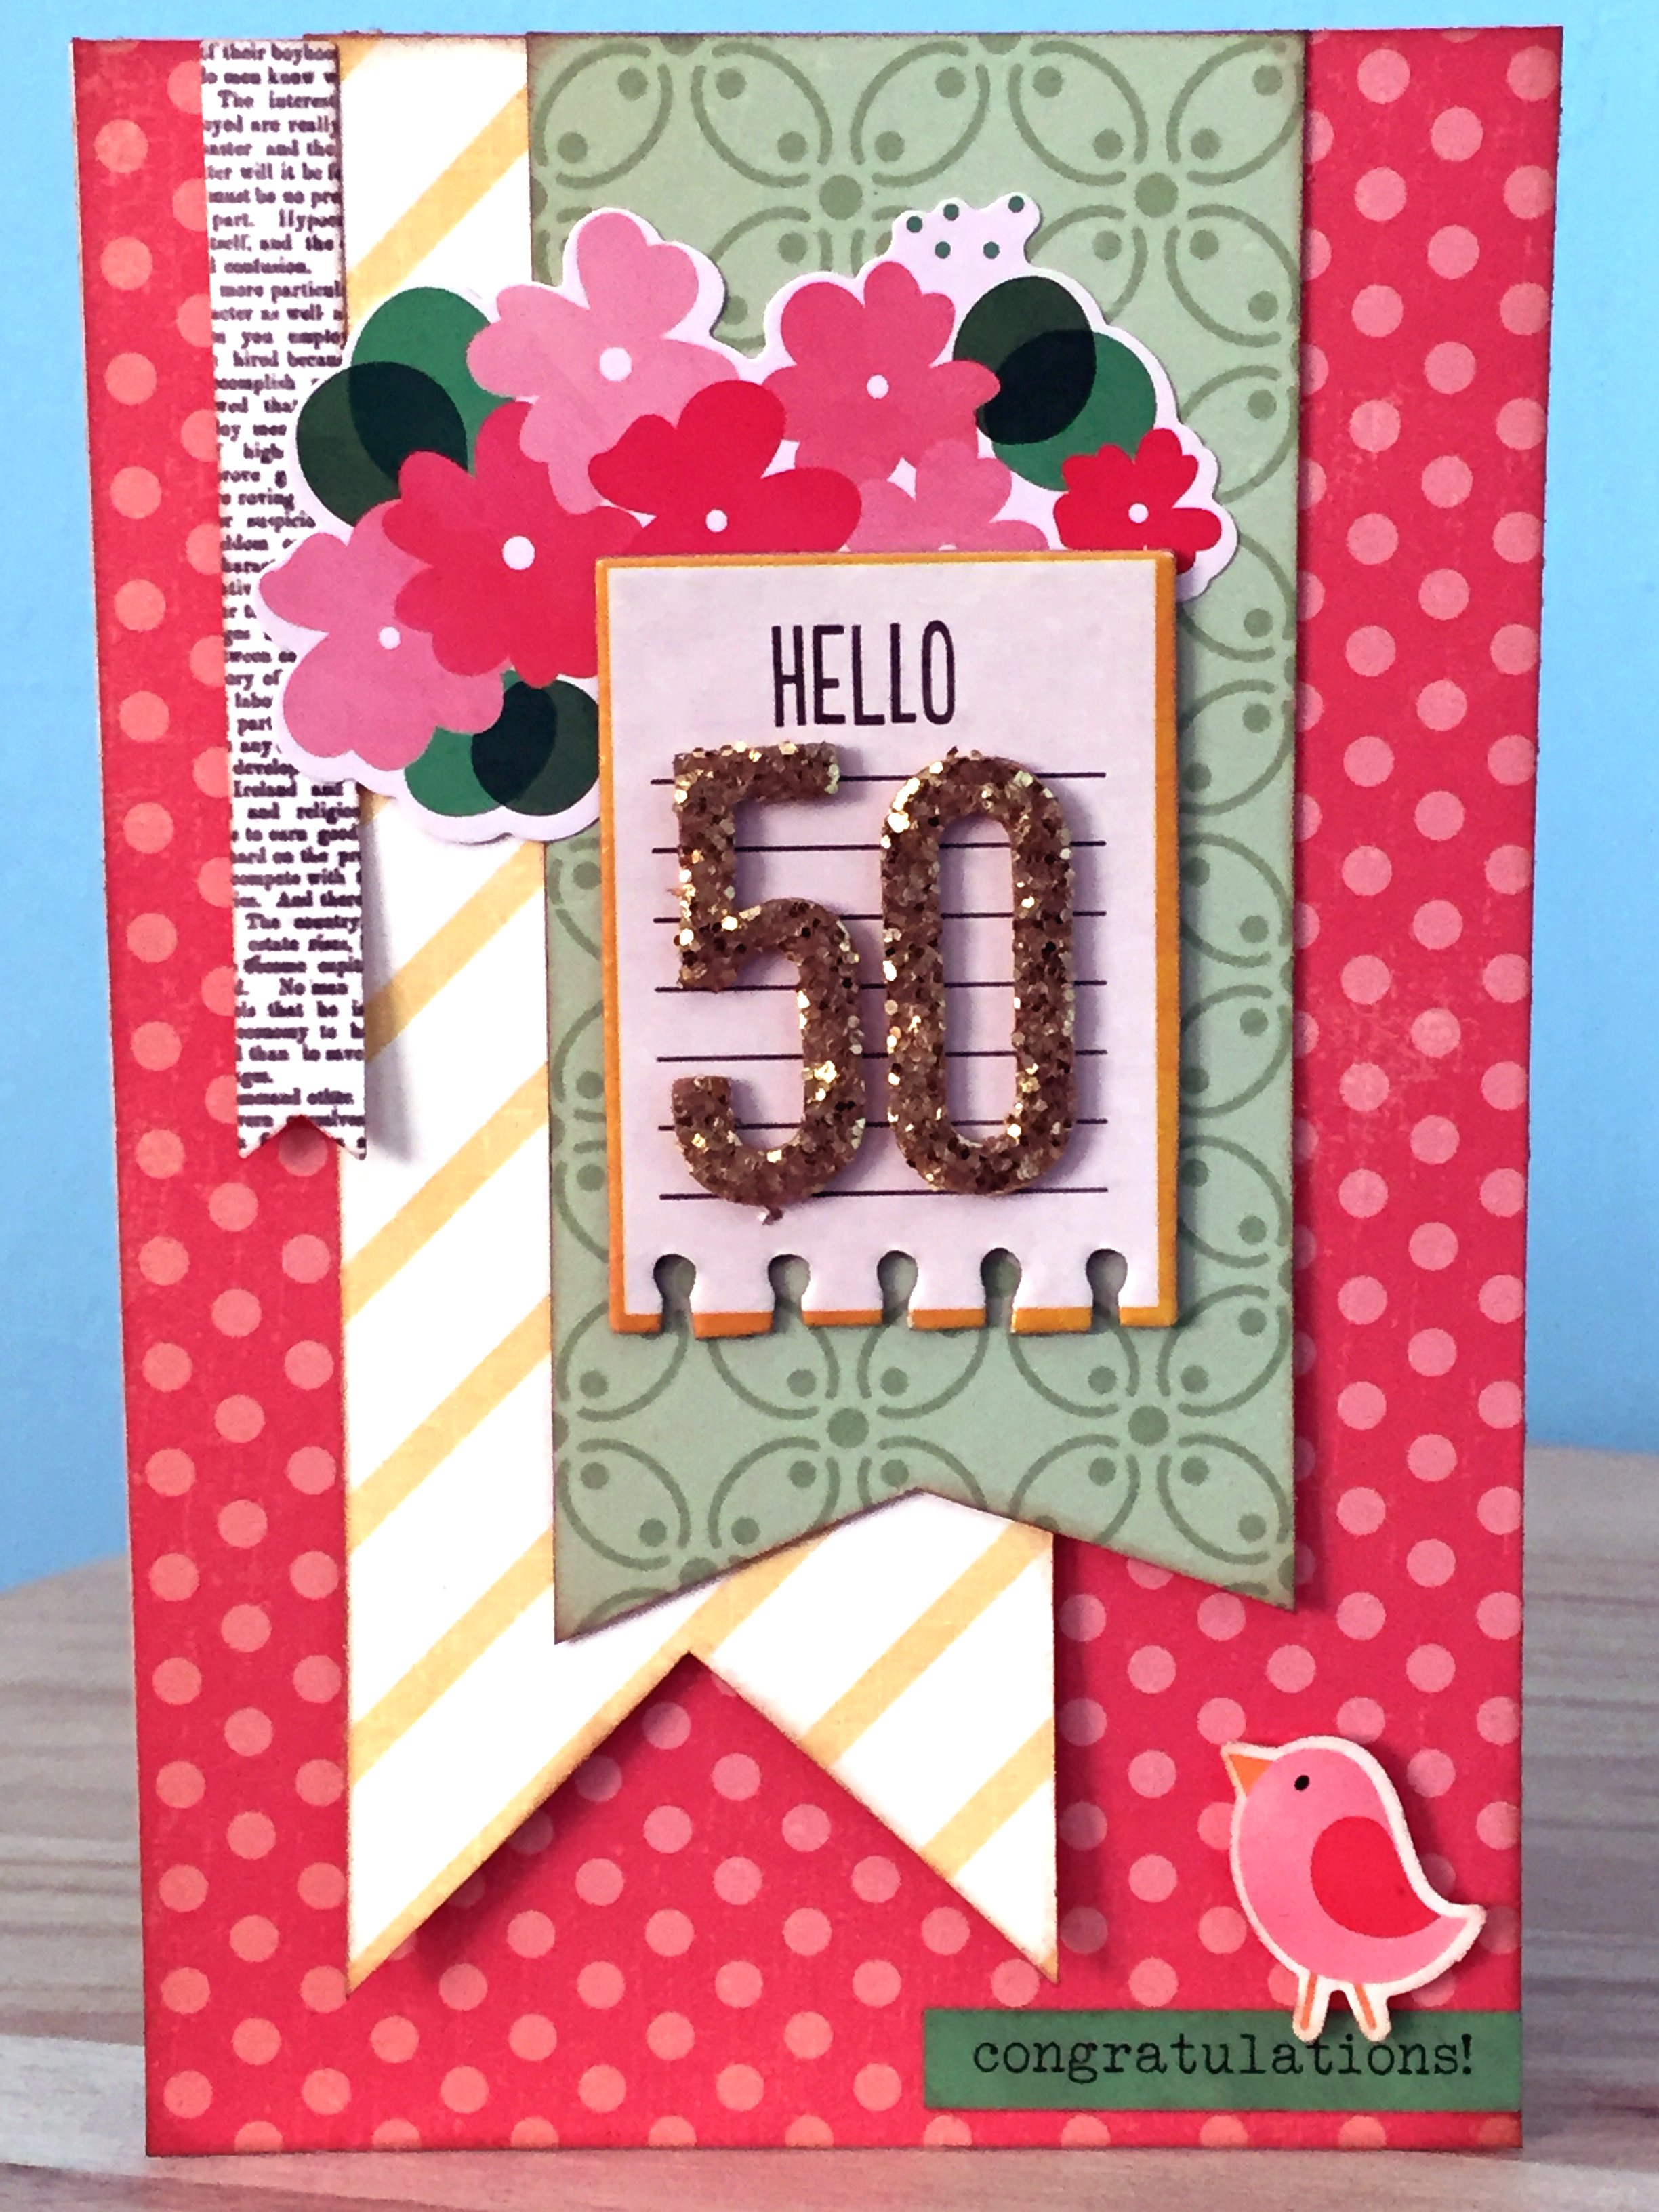
Hello 50 Birthday Card
So last week a friend at work turned the big 5-0. Naturally a special card was in order. I was excited to break into my new supplies and itching to use my new Pebbles From Me to You collection. And since this was a special milestone card, gold was a must!
October Afternoon's Cakewalk papers mixed really well with the Pebbles collection so I dug out some scraps to use up. I just love how cheerful these OA papers are (and to be honest, I've been hoarding that star paper for some time now).
I used the Pebbles sticker and chipboard accents to embellish. I also wrapped some gold metallic sewing thread around the green banner - it's very thin and subtle but just the right weight to balance out the design. And the chunky gold glitter Thickers are the Maggie Holmes variety by Crate Paper - I just love them!
Melanie absolutely loved the card, I'm pleased to say. She gave me a huge hug and kiss and said it was the nicest card she's ever received. Awww! Isn't it wonderful to give someone the perfect gift? Totally made my day. Heck, it made my week.
November 06, 2013
WIP Wednesday
Hello, everyone!
Well, I'm back from Stockholm - such a lovely city and fantastic capital. I had great fun doing the tourist gig - went up the Skyview on the Globe Theatre, visited the Vasa Museum and the ABBA Museum (squee!), went through the Royal Palace (old and current) plus the treasury and armoury and a bunch of other fun things. I'm hoping to print off the photos soon and I already have plans for using my Fancy Pants Down by the Shore papers for the Vasa photos (very famous previously sunken Swedish warship, in case you're not familiar with the name).
And speaking of holiday photos, back in July I watched this video by 2Peas Garden Girl Nancy Damiano and was unexpectedly inspired. I decided it would make the perfect gift for a friend's birthday, as we had holidayed together in Barcelona over Easter earlier this year. Anyway, I finally got to work on it this past weekend. Here's a sneak peak of the inside cover page:
As you might notice, I'm using the Simple Stories Snap! mini album and related products, which I found the local Panduro Hobby has recently started carrying. I've never done any sort of pocket scrapbooking before and I found the preparation a bit tricky; the photo printing in particular. Since I don't print at home, it was a bit challenging figuring out which photos I would need to order at special sizes before having planned out the whole album. In the end, I decided on which ones I wanted at 6x8 prints, made a bunch of collages and paired up 3x4 photos onto 4x6 sheets and printed any I wasn't sure about as both 3x4s and 4x6s so I could have some flexibility and this turned out to be a good idea.
I also discovered (although this should seem obvious) when I sat down with the prints and the album and supplies that it does take a much different approach than 12x12 scrapbooking and it took a little time to get into the groove of that approach. But I feel like I got it to work pretty well after I changed thinking about the album layout in terms of individual days and broke it up into themes, such as tours, sights, food, real life and so forth - then things started falling into place much more easily.
Here are a few more sneaks of the different chapters in the album and I'll have proper photos and a video later in the week to share with you.
I also whipped up a quick little card tonight for a student in my class who had surgery on her skull last week - she has a skull bone that never properly fused together when she was an infant and the surgery was to correct this. Poor thing is just 7 years old. Her mum emailed me today to say that the surgery went well and they brought her home from hospital yesterday and she's doing very well so that's great news to hear. I'll tuck this little surprise into her homework folder that her sister is picking up tomorrow - I'm sure it will brighten her day.
Well, I'm back from Stockholm - such a lovely city and fantastic capital. I had great fun doing the tourist gig - went up the Skyview on the Globe Theatre, visited the Vasa Museum and the ABBA Museum (squee!), went through the Royal Palace (old and current) plus the treasury and armoury and a bunch of other fun things. I'm hoping to print off the photos soon and I already have plans for using my Fancy Pants Down by the Shore papers for the Vasa photos (very famous previously sunken Swedish warship, in case you're not familiar with the name).
And speaking of holiday photos, back in July I watched this video by 2Peas Garden Girl Nancy Damiano and was unexpectedly inspired. I decided it would make the perfect gift for a friend's birthday, as we had holidayed together in Barcelona over Easter earlier this year. Anyway, I finally got to work on it this past weekend. Here's a sneak peak of the inside cover page:
As you might notice, I'm using the Simple Stories Snap! mini album and related products, which I found the local Panduro Hobby has recently started carrying. I've never done any sort of pocket scrapbooking before and I found the preparation a bit tricky; the photo printing in particular. Since I don't print at home, it was a bit challenging figuring out which photos I would need to order at special sizes before having planned out the whole album. In the end, I decided on which ones I wanted at 6x8 prints, made a bunch of collages and paired up 3x4 photos onto 4x6 sheets and printed any I wasn't sure about as both 3x4s and 4x6s so I could have some flexibility and this turned out to be a good idea.
I also discovered (although this should seem obvious) when I sat down with the prints and the album and supplies that it does take a much different approach than 12x12 scrapbooking and it took a little time to get into the groove of that approach. But I feel like I got it to work pretty well after I changed thinking about the album layout in terms of individual days and broke it up into themes, such as tours, sights, food, real life and so forth - then things started falling into place much more easily.
Here are a few more sneaks of the different chapters in the album and I'll have proper photos and a video later in the week to share with you.
I also whipped up a quick little card tonight for a student in my class who had surgery on her skull last week - she has a skull bone that never properly fused together when she was an infant and the surgery was to correct this. Poor thing is just 7 years old. Her mum emailed me today to say that the surgery went well and they brought her home from hospital yesterday and she's doing very well so that's great news to hear. I'll tuck this little surprise into her homework folder that her sister is picking up tomorrow - I'm sure it will brighten her day.
Cheers and check back later in the week for more on the album.
August 31, 2013
In an Octopus' Garden
I've been working on getting back into a regular scrapping routine since having returned to work recently. It's not been easy - especially the work; but we won't get into that. But I do have another new LO to share with you today; this time returning to my Barcelona holiday photos.
For the title, I reached into my basket of current supplies and just grabbed the first thing that called out to me - Amy Tan's vellum sticker alphas from Yes, Please. I decided to mix things up and use the orange letters, since there were pops of orange in several of the photos and I liked the idea of using a complimentary colour palette. I knew I also wanted to use this cute wave border strip so layered it up in the title along with the circular letter stickers and I really like the effect.
I've had these adorable fish buttons for a while now, just waiting for the perfect project and when I saw the little fish paper in Down by the Shore, it inspired me to use them here (even though I didn't use that paper on the LO in the end). A few white enamel dots add some textured air bubbles to each fish.
And I was so thrilled when I discovered that yes, I did have bright orange enamel dots and sprinkled a few in the topmost cluster, along with a piece of flair from a package I hadn't yet broken into.
I am totally in love with these CP retro slide frames. Not only do they look great and are a great eye-catching feature on a page but I love just how quick and easy they can make a page come together. I also especially like that these chipboards have a smooth texture, unlike many of the matte/pixelated chipboards used by many companies.
I started by blotting some blue and green spray mists onto my cardstock base, then sprinkled on more blue, green and some white mist and stamped some 'bubble' shapes around the page. There was a dicey moment when my acrylic block somehow flew out of my hand and landed stamp-side down in the upper right-hand corner but I just rolled with it.
For the title, I reached into my basket of current supplies and just grabbed the first thing that called out to me - Amy Tan's vellum sticker alphas from Yes, Please. I decided to mix things up and use the orange letters, since there were pops of orange in several of the photos and I liked the idea of using a complimentary colour palette. I knew I also wanted to use this cute wave border strip so layered it up in the title along with the circular letter stickers and I really like the effect.
I took my time fussing cutting this little octopus from FP's Down by the Shore. Got to use a new SC cork embellishment and added another pop of orange and some enamel dots.
I've had these adorable fish buttons for a while now, just waiting for the perfect project and when I saw the little fish paper in Down by the Shore, it inspired me to use them here (even though I didn't use that paper on the LO in the end). A few white enamel dots add some textured air bubbles to each fish.
And I was so thrilled when I discovered that yes, I did have bright orange enamel dots and sprinkled a few in the topmost cluster, along with a piece of flair from a package I hadn't yet broken into.
To finish everything off, I decided to back the page up with some distressed orange watercolour paper, do a little machine sewing around two of the corners and really distress the inner border for some depth and interest. I also think the distressed edge gives a little impression of an old 'message in a bottle' feeling.
Labels:
AC,
aquarium,
Barcelona,
chipboard,
CP,
distressing,
enamel dots,
fish,
flair,
FP,
mist,
octopus,
sewing,
slide frames,
vellum
Subscribe to:
Posts (Atom)