Showing posts with label Oxford Lane. Show all posts

July 22, 2013

So Many Happy Memories

Last Wednesday I shared this sneak of some supplies I had pulled for a new layout:


It took me a while to start working on it for two reasons.  First, my initial sketch ideas all seemed to gravitate towards designs that work best with portrait oriented photos and my photo was landscape oriented.  Second, I wanted a design that had flow and avoided the boxy feeling (I've been working with a lot of squares lately, it seems).  Then I realised I could adapt one of the sketches from Shimelle's Hitchhiker's Guide to Scrapbooking by using a large doily and after that, everything fell into place.


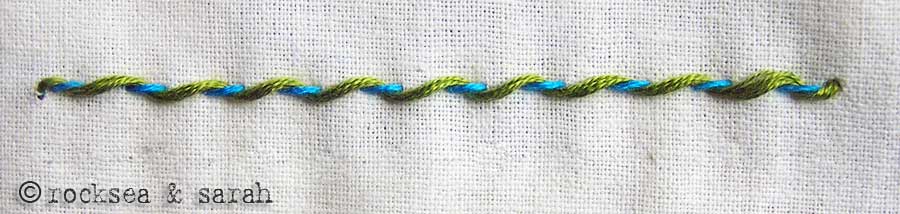
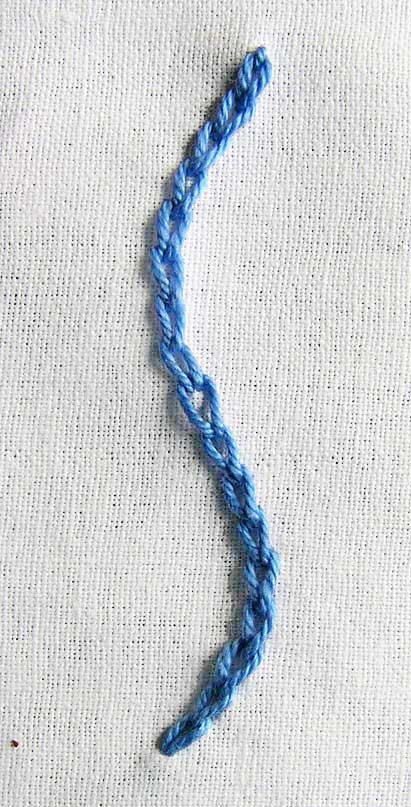
When I put these papers together, I immediately thought of using this photo.  I didn't even remember what the colours were, although it was probably a sub-conscious realisation.  I also wanted to use this lovely, bold floral paper from Oxford Lane.  I'm not one to often use floral designs - I'm more of a geometric girl - but it's so pretty and I like a challenge so I cut it into a circle to lay inside the doily.  I wanted to cover the seam between the paper and doily but didn't have any great ribbon choices so I decided to hand stitch using a fancier embroidery stitch - the chain stitch.  It adds such wonderful texture and dimension to the page and really draws in your eye - here's a detail shot:


I also thought I would carry the floral theme into the embellishments - also not something I normally do but I was recently sent some pretty Martha Stewart large flower embellishments and I have a few flowers left in my stash I thought I would use up.  In the end, I didn't use either of those but instead used this pretty fabric flower, which I paired with a felt bracket that I cut up to look like extra leaves.  I also painted some gold Stickles into the flower's center and leaves to liven up the white space inside the flower.


As it turns out, EP's Here & Now collection actually matches the turquoise, lime and yellows of Oxford Lane quite well so I used the element stickers to embellish a second cluster on the diagonal.  I liked how the cloud stickers had floral motifs in them, then added some arrows and butterflies.  I added more gold Stickles to the large yellow butterfly and to some random dots on the floral background paper.


I wanted to keep the rest of the page simple and airy so I used a banner strip for the title, ran a little embroidery floss along it and used a label to contain my journaling.  I also stamped the date and a sentiment along the right border and then drew a fine doodling line around the other three sides, because the design was feeling like it lacked grounding.

Want to try chain stitching on your pages, too?  I made a short video to help show you how.


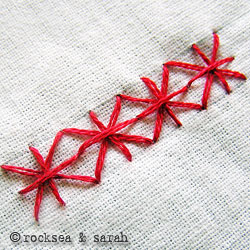
Now, if you like the look of the chain stitching and also like to hand stitch on your pages but have only used the running and/or back stitches, I would encourage you to try some more decorative stitches!  They really add pizzazz to a page and while they often look complicated, many are in fact very simple and transfer well to paper stitching.  You can find a plethora of embroidery stitch photo tutorials from Sarah's Hand Embroidery Tutorials and here are a half dozen beginner level stitches to get you started:
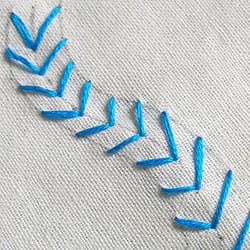
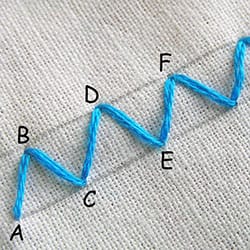
Arrow Head Stitches
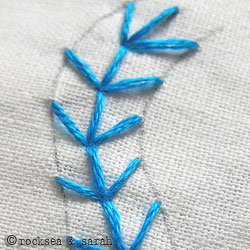

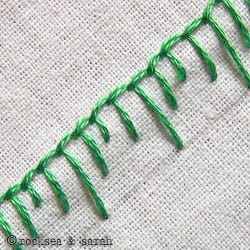
Blanket Stitches

Thanks for joining me today and I hope I've inspired you to try some stitching on your next page and if you do, I'd love to see it.

July 17, 2013

WIP Wednesday

So I have a few things going on in the craft department lately.  The largest is the age-old issue of organisation and functionality and at the moment, it's my scrapbooking supplies and process that needs the most help.  I have a reasonably small flat - a very comfortable size for just the cat and I but no spare room that can be used for crafting purposes.  This means that my supplies are spread out between the lounge and kitchen - the majority of the stash and stuff I'm not using at the moment is stored in various nesting baskets in the lounge while my current stash is in one big basket on the kitchen table, where I work.  I've also realised recently that I do most of my scrapping standing up these days.

So, I'm toying with the idea of buying a moveable kitchen island that I can use to scrap standing up and can choose whatever room in which I want to work.  I like the look of the Ikea Förhöja - a decent sized table top, drawers and two shelves.  I'm also thinking I could install some rails on either side to hang organisational pails and such.


To test out this theory, I spent Monday scrapbooking on my ironing board, which I set up at the same height as the förhöja island and it's nearly identical in measurements on the top.  It went quite well.  A very comfortable height and while I would love for a little more table top space, I think this will be a flexible solution, especially if I get the rest of my supplies stored better.  My lounge features a large Expedit-like shelving unit so I'll see about getting some baskets and perhaps pretty tins to fit into the bottom squares and possibly the famous ol' Raskog cart for extra storage and portability, which should fit nicely between my old computer desk and wall.

I also have designs for two new scrapbooking layouts rolling around in my head right now.  One uses the rest of my Kate & Co. Oxford Lane papers, which I discovered through chance while sorting through papers on Monday during tidy-up that they match beautifully with an Elle's Studio and Lily Bee Designs paper I bought in my last shopping spree - sweet!  I love when serendipity happens like that.  Here's a quick shot of some of the supplies I've pulled:


And finally, I've been making some more progress on my Albertan Relief quilt blocks.  I got the second green block sewn up last weekend.  Still need to do a second orange block and I definitely have enough red scraps to do one more red one, too.  Hopefully I can get those whipped up before next week so I can ship them off to where they're needed most and not laying around hogging up my ironing board (since it's apparently now doing double-duty...).  Here's the new green block:


Oh!  And I nearly forgot, I'm taking two scrapbooking classes!  I took advantage of the recent 2Peas 20% sale and bought access to Shimelle's Hitchhiker's Guide to Scrapbooking and Amy Heller's Through the Kaleidoscope classes.  I've decided I'm going to focus on one at a time and I'm starting with Hitchhiker's, because I always think it's important to review the basics (and I adore Shimelle :P ) but I'm super geeked to check out Amy's colour theory class afterwards.  Right now I'm enjoying a chapter a day and I think one of the sketches from chapter two will be put to good use with the second layout that's mulling in my head at present - fingers crossed!  And Wilna mentioned in yesterday's In the Mood to Scrap video that she'll be releasing an Art Class II this autumn - how exciting!  Her current one is still on my wishlist but you can be sure it will be the next class (or set of classes, now it seems) that I take.

June 20, 2013

June Haul - A Video Experiment

So today I decided to take on a little experimental video project - that's right, I played around at making my first ever video.  It's nothing special or ground shattering; it's pretty much just a run of the mill haul video (boy, am I selling this to you or what?).  There is a little back story or two behind it, though, so perhaps that will help to perk your interest and if nothing else, I would love to get some feedback on how I did and suggestions for improvements.  It's been a real learning curve, figuring out how to best set up my tripod for shooting, dealing with a dead camera battery and subsequently editing/merging the two videos together, the long saving and long uploading process...  But here it is!


Okay, so time for a little self-reflection.  I think I babbled too much and really shouldn't have gone through all the papers to the extent that I did.  I also need to remember to keep the products on the table or just barely above them so they fit into the shot and don't blur.  I should also probably close the window to avoid the train noise but today was just too hot to do that.

I also promised in the video that I would link up some of my work I referenced.  Here are my two recent projects featuring the MME Oxford Land papers I've been using.


I'd also like to take a moment to give a hearty note of thanks to Shimelle Laine for her very generous NSD challenges and prize opportunities.  Last month I took part in many of her challenges and I was thrilled to be randomly selected as the winner for the Scrap About Yourself challenge with this LO:


Earlier in the week I received an email from Shimelle about the prize - free entry into not just one but two of her upcoming online classes!  The first is her already announced Masterclass on layering - sounds perfect for me; I like to layer!  The second is a yet to be announced online class through her website - no title yet but I'll keep the details she mentioned to myself right now, as I'm not sure how much she wants revealed at this point but it sounds awesome!  It was the perfect start to my summer holidays, since I'd been planning to take another of her classes.  I'm super stoked and can't wait to start!  I just hope they open up now over the summer so I can really focus on them.  Thanks again, Shimelle!

And finally, I'll share some photo love from my quilt guild's recent trip around Småland last Sunday.  We began by driving up to a jam-packed little shop just outside of Perstorp (in the woods).


As you can see, many lovely creations on display.  I bought a handbag pattern and a set of Marmalade candy pre-cuts to use with it and also three FQs in black, white and a silvery grey for a penguin doll we'll be making for guild.
Next we drove foreeevvverrrrr (or so it seemed) to a golf club for lunch (scrummy food, definitely worth it) and then headed off to the Sprätthonsen quilt exhibition, held is this truly beautiful old barn.  A few of my favourite photos:


Finally, we visited Tyger & Ting quilt shop, where they also had a number of samples on display but I particularly love their back porch display:


I was reasonably well-behaved and 'only' bought two charm packs and a tulip table runner pattern (yes, I know I still haven't made the tulip runner I bought from them last year but this one is different...).  They also threw in a free partial pattern for a runner adaptation of Garden Fence, which is how I stumbled across Cindy's great blog, Hyacinth Quilt Designs (check the links list to the right) - a girl after my own heart and such a great name, too!  Here's the photos of my 'hauls' from this day:


I'm thinking that I might use the Aspen Frost charm pack for the Garden Fence runner and if I start it over the summer, I might actually have it done by the time the holidays roll around (or not)!

June 19, 2013

WIP Wednesday

I feel like there's a lot I want to share recently but I'm going to break things down and not flood the blog all at once.  Right now this is what I'm enjoying most:


Now that summer holidays have officially arrived, it's 100% craft and "me" time - swoon!  Since I don't have an extra bedroom to use as a craft space, I like to set up my sewing machine out on the balcony when the weather is nice.  There is something particularly lovely about stitching outside with the sunshine and a light breeze, watching the trains go by (just behind the fence in the distance).

My current WIP (work in progress) is a Ricky Tims Harmonic Convergence wall hanging.  I made the top about two years ago during a sewing project day with friends but I was never happy with the inner border - it was decidedly blue and didn't really go well with the rest of the colour palette.  Then one day at quilt guild, a vendor had this fabric that I snatched up:


Isn't it just yummy?  And scrapbookers, look carefully - yes, that is a MME fabric!  I'm in total love.  So a few months ago I ripped off all the borders with the plan to replace the inner blue border with this lovely turquoise one but never got that far.  Yesterday I sat down and began the process of adding the borders back on and it's looking so much better now.  The top border is giving me some issues, however.  Despite everything being squared up properly, the border and cornerstones aren't matching up well but I'm sure I'll get there in the end.

Here's a general layout view for you (along with Oskar, who is 'snooper-vising'):


You can see that I've made the borders directional so that the cups look like they're hanging.  The folded fabric in the top left will be the backing fabric.  I haven't decided on the binding yet - probably either that luscious turquoise or the brown.  I may also fussy cut and applique one of the teapots onto the design, too, but that's still being debated at the moment.  For quilting, I'm thinking swirls to mimic steam throughout the body and possibly waves along the borders and maybe concentric circles in the cornerstones.  My machine doesn't quilt well, though, so this might end up being a hand quilt project...

Next up, I sat down today and made a belated Father's Day card for my step-father.  With all the bustle and stress of end of school work, Father's Day just sort of hit me out of the blue.  I was a good girl and made a point of ringing him up but thought I should send along a card, too.


A lot of my inspiration for this card came from working with the MME Oxford Lane papers when putting together my Gaelic Girls LO - the colours are of course masculine and a wee bit retro and I liked how well they paired with both the Maggie Holmes gold glitter Thickers and the Webster's Pages Composition & Colour neon yellow washi tape (seriously, if you love Oxford Lane, invest in this tape, too - they are the perfect match in both colour and style).

I also had some inspiration from this week's Stash Busters Challenge at 2Peas, specifically prompt #1 (use something shiny) and prompt #2 (use something natural).  I recently found these lovely kraft corrugated die-cuts at my LSS and decided to try them out and I knew I wanted to use one on this card.  The MME papers are all white-based, however, so I decided to pull in a little more kraft with the matting and I made a border of the yellow washi tape to remove some of the over-powering white and help draw out a little more pop of yellow in the process.  The button is made of coconut wood and sort of reminded me of a suit button, which would compliment the necktie.  I think the few sequins and the glitter Thickers are just enough bling without going overboard and still works well together with the kraft elements.  If you'd like links to this project's shopping list, you can check it out here: #1 Dad card.

That about wraps it up for today.  What are your current WIP?