Showing posts with label handbag. Show all posts

January 09, 2016

2015 Year in Review

Welcome back and Happy New Year!

For the first time ever, I feel I was productive enough with my sewing last year that I can justify writing an annual 'completed projects' post - yeah!  It's all thanks to my new-to-me sewing machine, my Janome 6600P.  So without further ado, here is a run down of last year's finished projects.

Dinosaur Baby Shower Gifts

Six Pocket Tote Bag

Baby Quilt - Group Sew

Tula Pink Handbag

Harmonic Convergence Wallhanging

Diamond Jubilee Jelly Roll Race Quilt

That Cat Wallhanging

So six completed solo projects, one completed group project, plus another three quilts/wallhangings very close to completion - that's a pretty tidy sum for a year by my record.  Stay tuned for a peak of what I hope to have in store for 2016, coming soon.

July 24, 2015

Tulapink Handbag

Hello and welcome back!

If you'll recall, earlier this week I shared my new sewing machine with you - a Janome MC 6600P - and I also mentioned that I'd already completed a project on it but at that time I didn't reveal what it was.  Well, now is the time.

In preparation for a recent sewing day with friends, these luscious Tulapink fabrics followed me home (completely on their own accord, I swear!):


From my own perspective, I found this really interesting, because that beautiful eclectic top motif is so not my usual style (bold colours, clean and geometric design).  And while I'm definitely a big fan of orange and turquoise, those lovely lilac and lavender shades of purple rarely see their ways into my wardrobe or projects.  I guess what I'm saying is that even I was surprised with my choices here but I had a plan...

So from that - to this:


I really couldn't have planned a better fit for the fabric on that flap had I tried.  In addition to the lovely fabrics, I used a double-sided fusible stiff interfacing (quite stiff) so the bag retains its shape even when empty.


There is a zippered pocket on the back.  I love that little peak of lining fabric around the zip.  Incidentally, this is the first time I've shortened a zipper for a project - crazy easy; why haven't I done this before?


And on the inside, there are two spacious interior pockets and plenty of space for even long wallets and sunglasses and the like.

My new Janome sewed through that stiff interfacing and multiple layers of it and fabric all like a breeze.  I did use my old Elna girl's freearm to sew the lining to the top of the bag and do the top stitching along that top edge but the rest is pure Janome work.  This bag has some pretty serious WOW factor going for it - or so I've been told by those who have seen it.

If you're interested in the pattern (the handbag is called 'Paris'), it's available for free from Romanian Quilt Studio.  It was very well written with clear instructions and plenty of helpful photos and diagrams.  The only addition I would make to the instructions is that when you sew the lining gusset to the lining sides, it doesn't state what seam allowance to use.  I would recommend that you use a 1/4" SA for this.  I mistakenly used a typical handbag SA of 3/8" and my lining was a bit small matching up to my bag.  I made it work but the smaller SA would have made it a perfect fit.

June 30, 2015

Six Pocket Tote Alterations

Hi, folks!

Over the years, I've made many of these handy six pocket tote bags - they make especially nice nappy bags for new mums.  In fact, the last bag I made for a co-worker going on maternity leave was such a huge hit at the baby shower, that I received requests for a few more.  They're a really nice sewing project and whip up easily within a day.  So, now that I'm on summer holiday, I headed down to the fabric shop and walked out with these gorgeous Amy Butler fabrics:


Aren't they absolutely lush?  I surprised even myself, because green is my least favourite colour and yet it was that beautiful emerald swirly print that just kept drawing me back to it.  I guess the copious amount of turquoise mixed into the colour palette made the difference.

And viola!  A finished handbag, which I think would make a lovely beach bag (not that we currently have much in the way of beach weather so far this summer...):


Now, over the years I've made a number of changes to the original pattern, which I thought I'd share with you in case you were interested in making a similar bag.

Supplies 
The original pattern calls for firm batting.  I have traditionally used Thermolam, which works well and gives the bag moderate structure while remaining soft and flexible.  However, as the bag construction requires a lot of layering, the thickness of the Thermolam is less than ideal and makes precis sewing a bit challenging.

My change: This time I decided to try a light-medium weight fusible batting.  It took longer to fuse to the fabric but the sewing through the multiple layers was significantly easier.  Structure wise, it was softer compared to the Thermolam but adequate for a tote bag.  If you want a lot more stiffness and less bulk, then fusible interfacing would be the way to go as another alternative.

Measurements & Cutting
The original pattern produces a tote bag measuring 8 x 10 x 4 inches.  This is a nice size but I wanted something just a wee bit larger so I decided to increase it by 1.5 times.  Below are the measurements I've been using.

My change - Shopping:
Body & lining fabric - 70 cm (3/4 yard)
Pocket fabric - 60 cm (1/3 yard)
Handle fabric - unchanged
Batting - 40 cm (1/2 yard)

My change - Cutting:
Body & lining fabric - cut 2 each, 19 1/2 inches by 25 1/2 inches
Pocket fabric - cut 2 each, 19 1/2 inches by 21 1/2 inches **
Handle fabric - cut 2 each, 4 inches by 34 1/2 inches
Batting - cut 2 each, 19 1/2 inches by 12 3/4 inches

** If you'd like a bit more of the body fabric to show behind the pockets, cut 2 each sized 19 1/2 inches square instead.  This will make the pockets slightly shallower but they will still be plenty deep and roomy and I really like the extra background fabric on show.

Also remember to check your pocket fabric for print directionality before you start cutting!  I know that it seems obvious to say this but even despite all of my sewing experience, this can still bite me in the rear.

Construction
The original pattern instructs you to sew the handles up to the height of the batting (which extends beyond the pockets).  This is fine but I've always found the straps are a bit tight around when slung over my shoulder and if you're wearing a bulky top/sweater or a coat, it's extremely tight.

My change: This time I only sewed the handles up to the top of the pockets.  This means that provided the bag isn't filled to bursting to the top, there is extra room for my arm and bulky clothing to fit through the handles while not needing to use any extra fabric.  Win/win.

Finishing
The original pattern requires no finishing on any of the edges.  However, I have often felt that the top edge of the body print needs just a little something to keep the shape and prevent the batting inside from flopping around.

My change: I now top stitch around the top edge of the bag body.  I keep it very tight to the edge, about 1/8 inch.  It gives a very professional looking finish, adds structure and helps to keep the batting inside in place.


Now, don't you need a snazzy new beach bag of your own?

February 09, 2014

Pinspiration Sunday

Welcome back to another (hopefully) cosy Sunday filled with eye candy and inspiration!  I'm presently tucked up on the sofa watching some Winter Olympics and feeling extremely tired, having scrapbooked in my brain most of the night when I should have been sleeping.  Is it just me who does this or anyone else fall victim to inspiration in the middle of the night that disrupts your sleep?  Needless to say, it will be an early night.  Anyway, enough of my ramblings - go grab your hot beverage of choice and join me on the sofa...

Currently:

* watching - Winter Olympics (ski jump)
* reading - The Persian Pickle Club (downloaded; honestly starting this soon!)
* making - finished a UFO LO and two cards today - whew!
* eating - Swedish pankakor (pancakes) with strawberry jam - YUM!
* drinking - water
* wearing - jeans, knit shirt & cardie (plus blankie)
* weather - clear, 5C
* feeling - tired but accomplished
* wanting - to go back to bed
* needing - to just get through one more week of work
* planning - my Persian Pickle project
* thinking - of possible new blog names (have any suggestions?)
* loving - having spent the day being crafty
* enjoying - having spent all day yesterday in bed  **bliss**

And now on to the pins...

How gorgeous is this quilt?  All of those perfect little squares remind me of little postage stamps, all neatly organised.  Fab colours, too.  Want.  Seriously.

I so love orange peel quilts!  I'm totally lusting over this one with its combination of rainbow peels and hap-hazard newsprint background fabric (I'm a sucker for text prints in fabric or paper).  The instructions on this blog entry are very detailed with a lot of photo references.  This one is going on my to-make list once I've done a bit more hand applique.

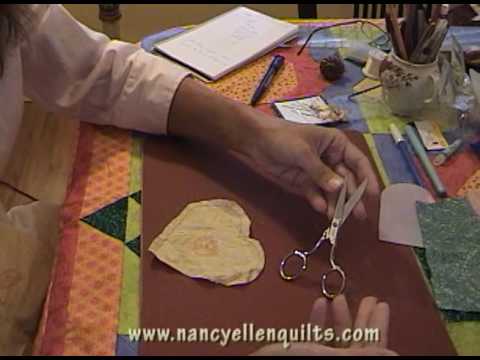
One of my skills I want to learn (or perhaps in this case, improve upon) is my hand applique.  This is a good beginner level video that covers the basics of tools, getting started and the basic stitch and turning.  Additional videos cover curves, points, etc.

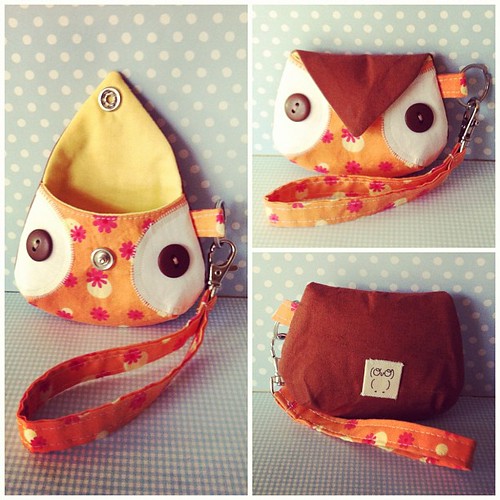
We can't have a Pinspiration Sunday without some sort of owl cuteness so here's an adorable handbag.  Link to the pattern ($5.00 USD) on the webpage.

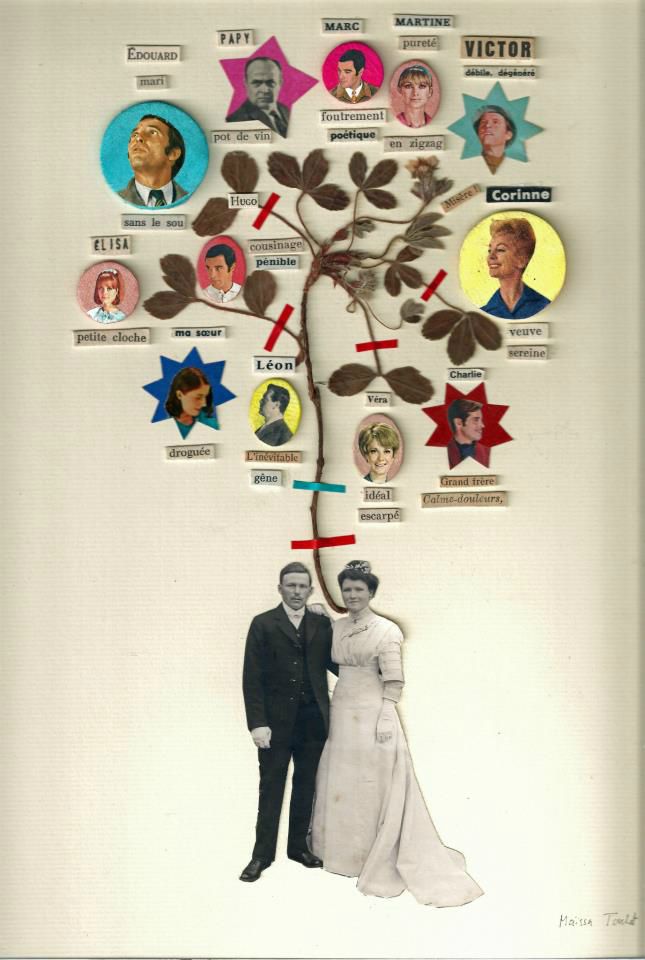
A couple of weeks ago I shared an awesome family tree quilt so it seemed fitting to do likewise with a scrapbooking LO.  Clearly this particular page isn't my style (although it might be yours) but there is so much inspiration one can draw from it.  Pretty spiffy.


Here's a simple but pretty and nicely balanced Valentine's Day card that doesn't really require you have a Valentine's-themed pack of supplies or even the traditional red/pink/white colour palette.

This will probably be the last of wintery cards we can reasonably share at this point in the season but I couldn't resist this adorable nested circle snowman.  I love the unexpected perspective and it's so simple, you could easily assembly-line these.

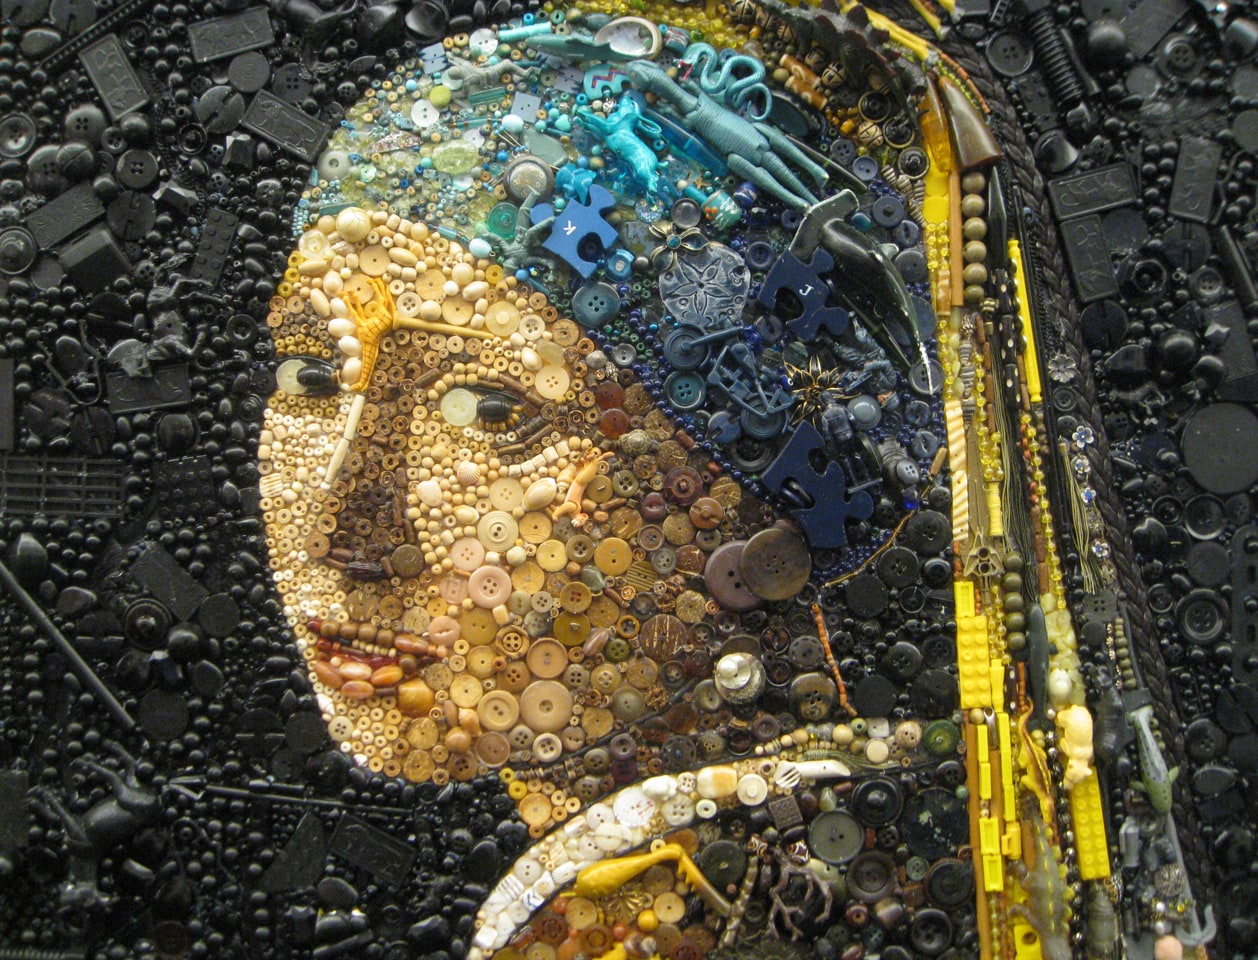
OMG, these recreations of classic paintings and photographs will blow your mind.  Artist Jane Perkins uses found objects such as buttons, beads, plastic toys, etc. to reproduce classics and they are AMAZING!  Girl with the Pearl Earring and the National Geographic Girl are my favourites.

I may be a month off with this one but if you're looking for some inspiration of a different flavour, you may wish to try Julie Kirk's My Month in Numbers.

We've had some lovely spring-like weather here in Malmö today so it seems fitting to have a little spring time colour palette.  There's also a little touch of pink in there if you're working on some Valentine's projects currently.

And finally, because I'm completely obsessed (in a good way, of course) and whole heartily believe in the vision of this organisation, I'd like to once again mention Kiva.  Kiva is an organisation that helps people, many of whom live in developing, war-torn or natural disaster-prone countries to finance loans that improve their lives.  They do this by providing people like you and I to fund micro loans.  It's an amazing organisation - please take a few moments to read up on them and consider lending a hand.